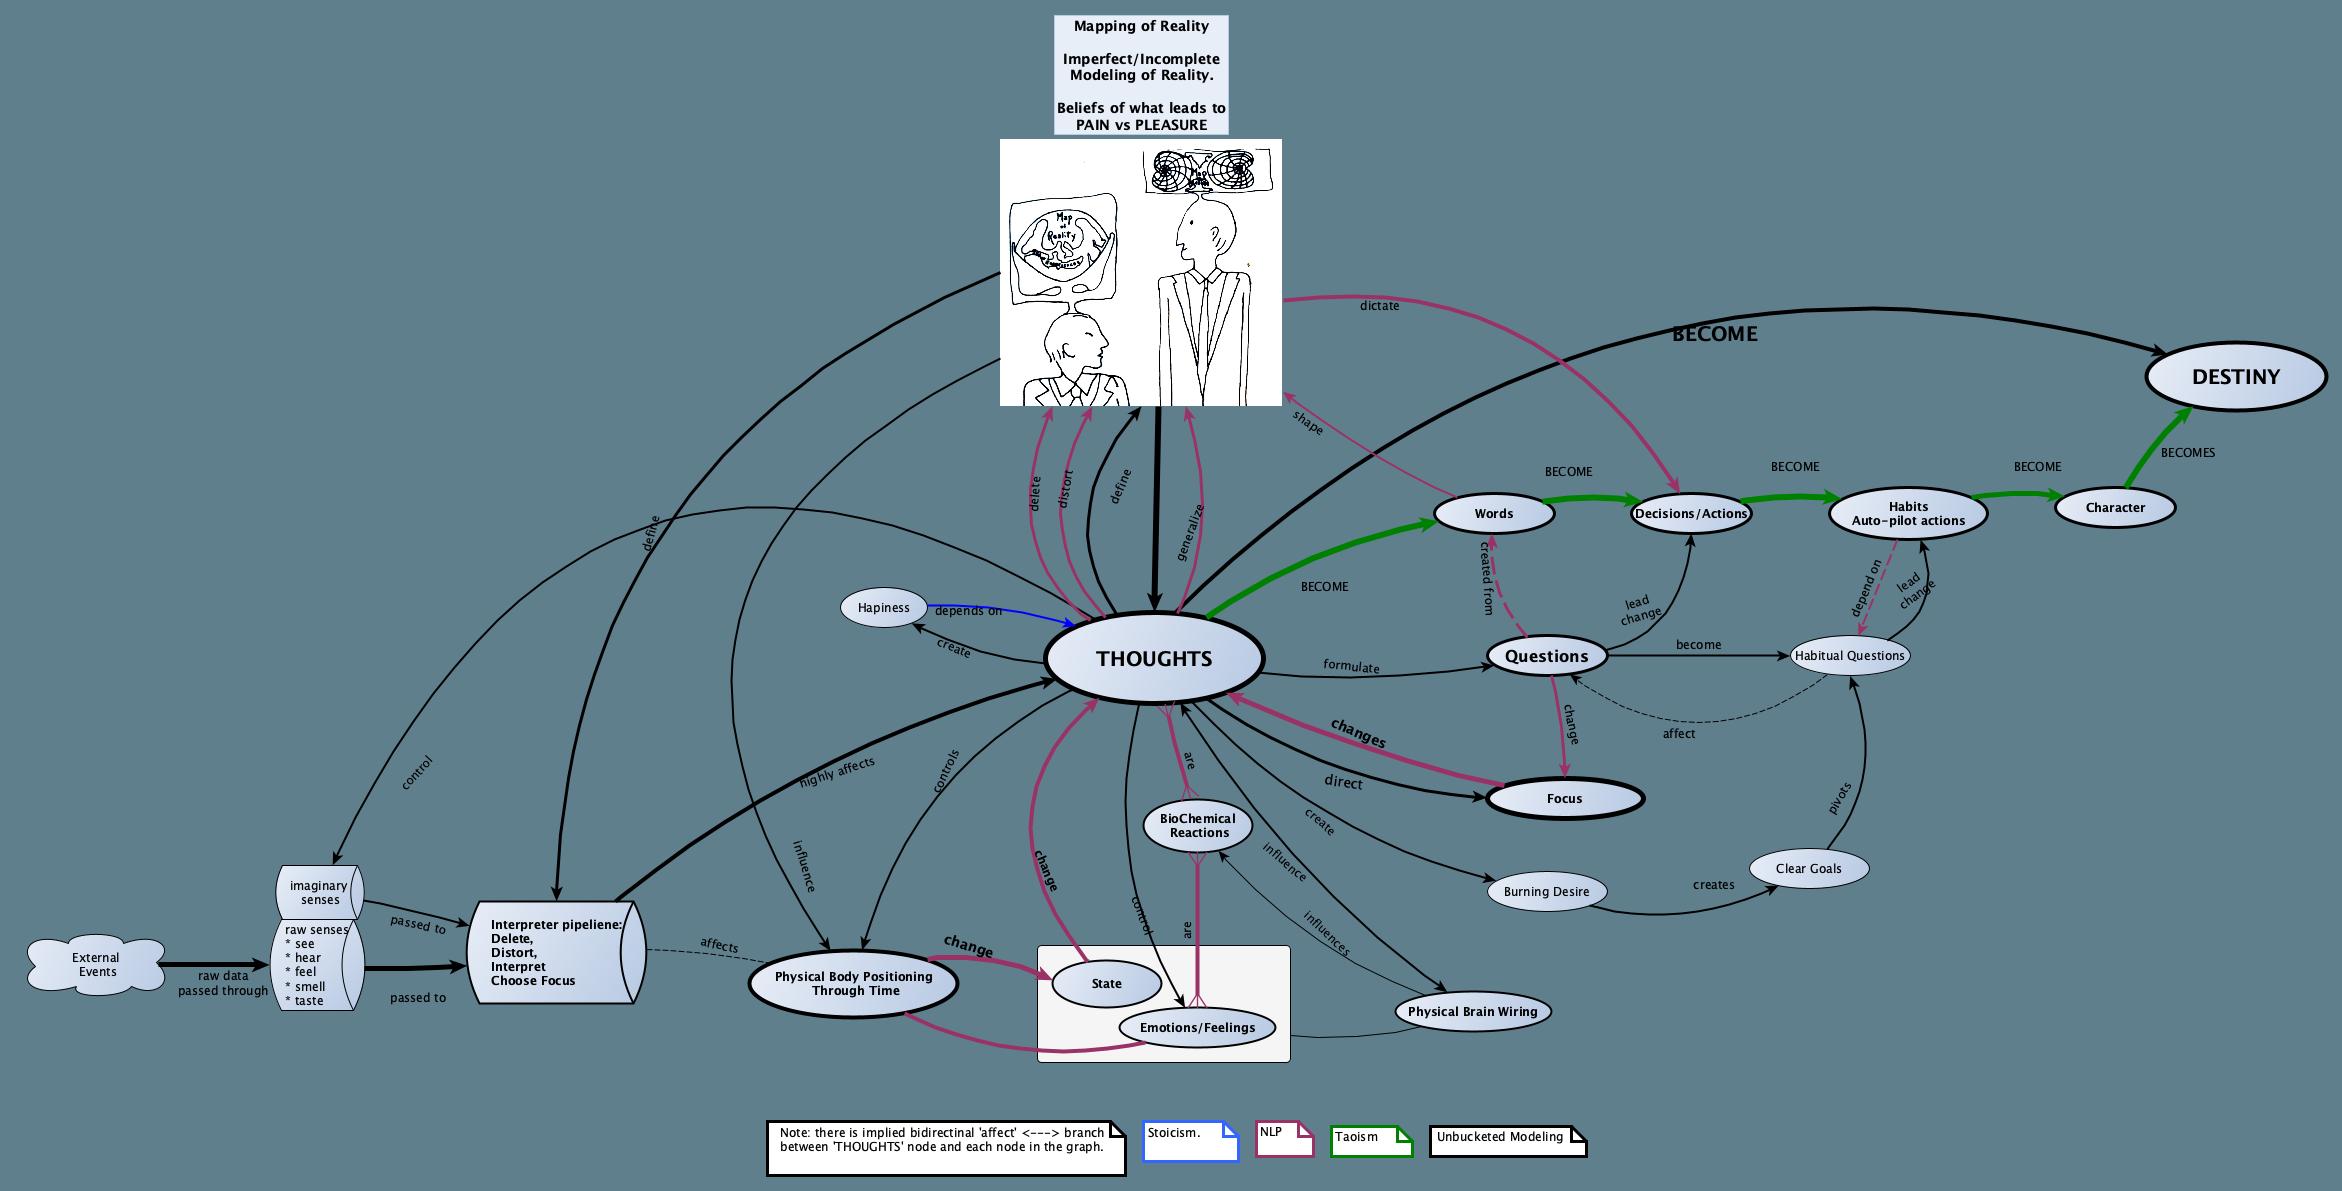
I use this place to clarify my thoughts, and share my notes on various topics.
The areas of interest to me include:
Philosophy
Personal Development
While there are notes on Software Development they haven’t been updated in a while and I will be deprecating these notes, especially with advent of agentic development the principles need to be re-evaluated to fit a more modern paradigm.
Highlighted notes
Highlighted Notes
Clear Goals
Having clear goals is vital for steering your life.
flowchart LR
    A[Goals]
    D[Where You Want to Go]

    A -- Determine  --> D
Goals determine the direction of where you want to go. Hence, establishing clear goals is to establish an aim, the direction of where you want to go.
Image Description
This is a dramatic black-and-white illustration depicting a man in a suit striding forward through a tumultuous scene. The background includes towering storm clouds overhead, swirling papers caught in gusts of wind, and a city skyline in the distance. He appears to be walking across rough, churning waves, as though undaunted by the storm around him. He holds a large compass at his side, its cardinal directions visible. Leaves and pages seem to be swept into the air, reinforcing the sense of chaos and motion. Despite the tempestuous surroundings, the figure projects a sense of purpose and determination.
flowchart LR
    A[Hyper Successful People]
    B[Gurus of Success Training]

    C[Imprtance of Goal Clarity]

    A -- "state" --> C
    B -- "state" --> C
“Life favors the specific ask and punishes the vague wish” - Tim Ferris
Furthermore, We can logically presume that our chances of arriving of where we want to be are orders of magnitude higher if we have a clear idea of where we want to go. (aimless). And put our energy and focus towards that direction.
How to Establish Clear Goals
Genie Laborde way: Have clear outcome
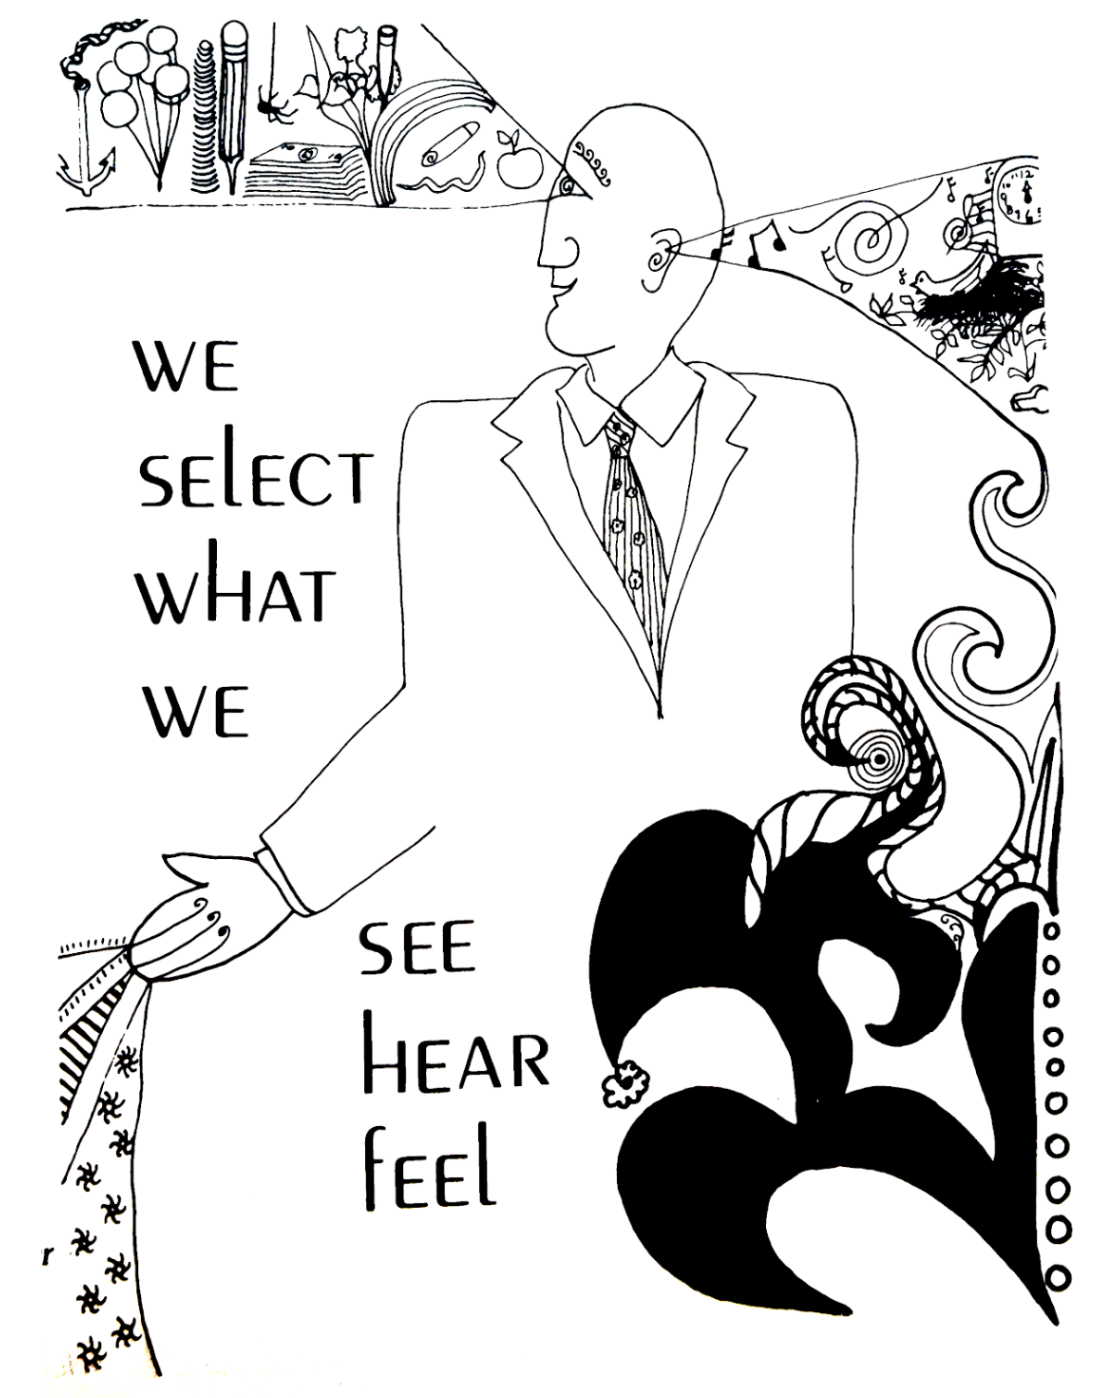
SFH-Outcome (See, Feel, Hear)
Use See, Feel, Hear terminology
Outcome specification is more specific than “I want X amount of money”.
Instead of using abstract numbers of desire, Outcomes are described in terms of:
You see.
You hear.
You feel.
Be specific. Use SEE, FEEL, HEAR terms.
Questions that should be answered
What do you see?
What do you hear?
How do you feel?
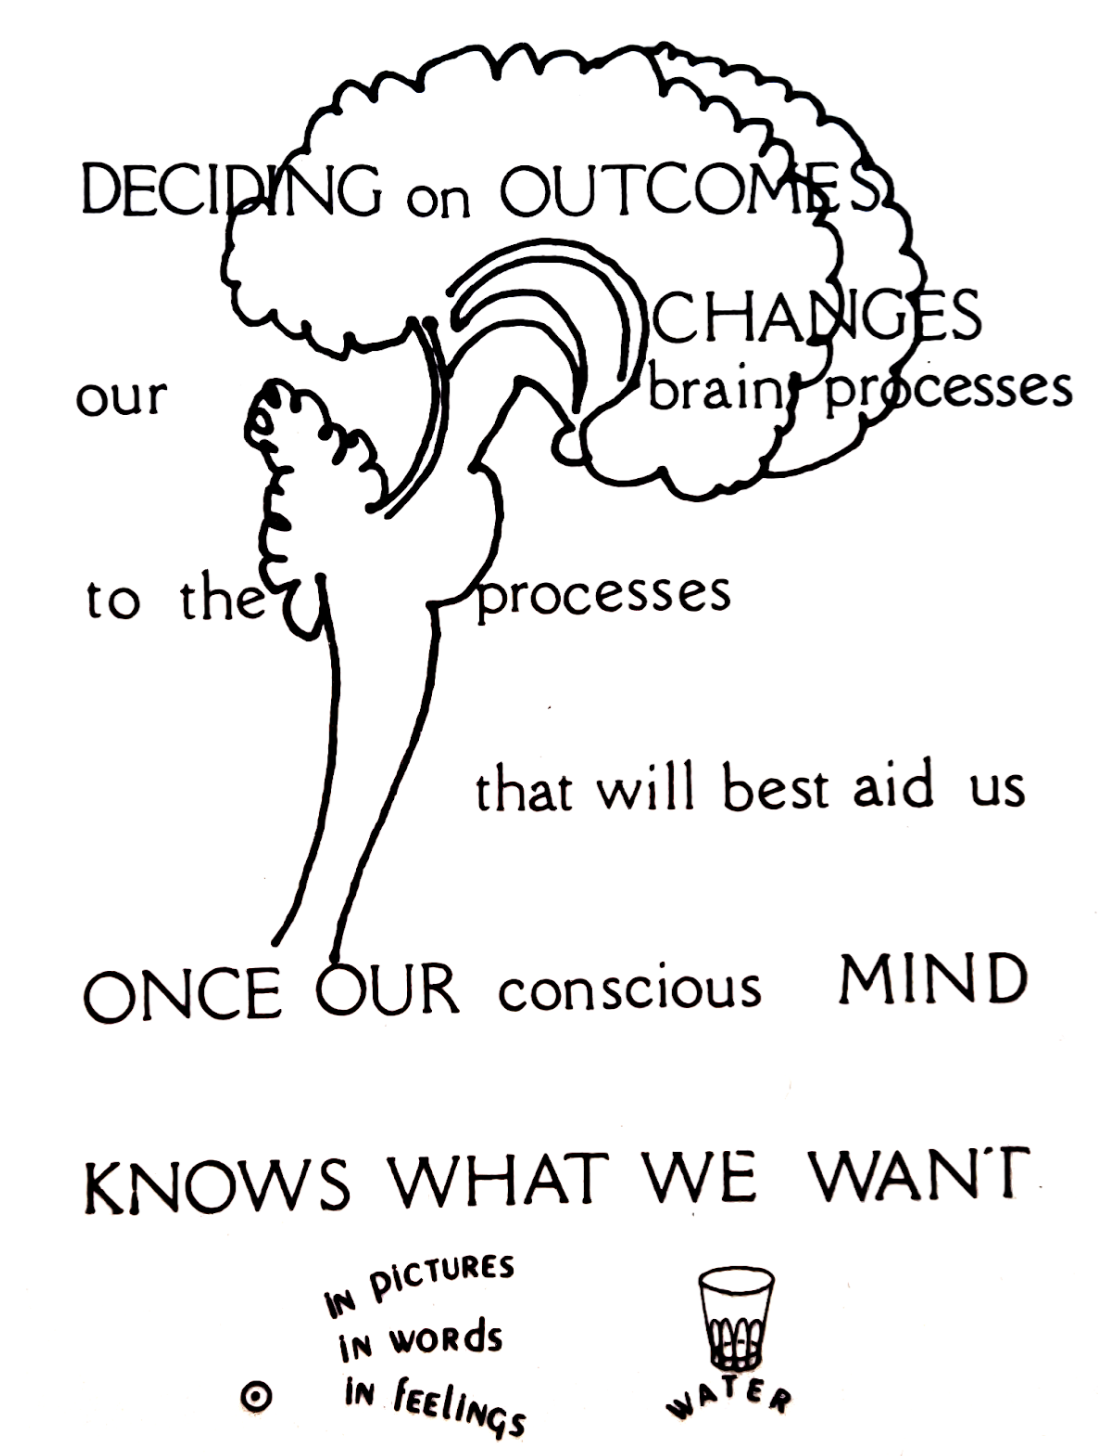
Outcome change, Changes our interpretation of Objective Reality
Specifying an outcome can immediately change what you see, hear and feel. - Genie-Laborde
Clarity of outcome points you in the direction towards it
First Rule is Trust Yourself: Figure Out Who You Want to Be
The first rule is: Trust yourself
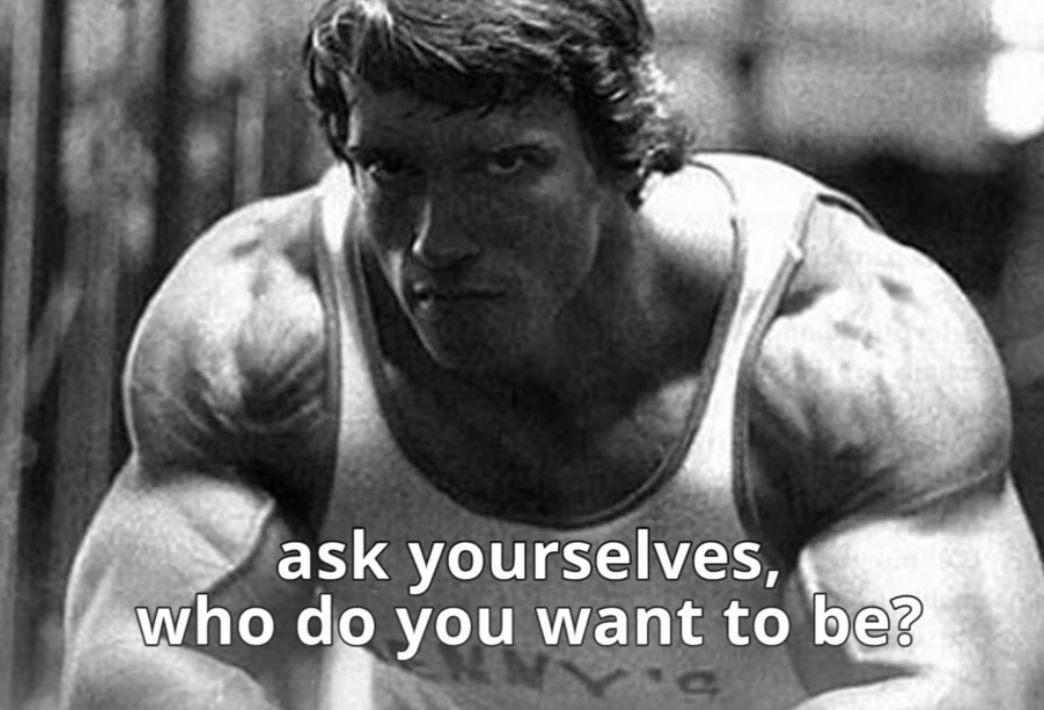
And what I mean by that is, so many young people are getting so much advice from their parents and from their teachers and from everyone. But what is most important is that you have to dig deep down, dig deep down and ask yourselves, who do you want to be? Not what, but who.
And I’m talking about not what your parents and teachers want you to be, but you. I’m talking about figuring out for yourselves what makes you happy, no matter how crazy it may sound to other people. - Arnold-Schwarzenegger
First say to yourself what you would be; and then do what you have to do. - Epictetus
From this instant on, vow to stop disappointing yourself.
Separate yourself from the mob.
Decide to be extraordinary and do what you need to do—now. - Epictetus
Tim Ferris writes that asking a question “What do you want?” is not a good starting point as its too imprecise. He states that “What are my goals?” also falls short of the mark. The question he suggests is “What would excite me?”
Why you will prioritize this purpose above other distractions to laser focus on the path to getting there.
Coming up with Magnetic goals
Magnetic Goals, That Pull You towards Them
The best goals aren’t the goals that you have to push yourself to work towards.
But rather goals that you are magnetized towards. Goals that pull you towards them.
Goals that you can easily be obsessed with. That are easy to make trade off decisions for. As you are going to have to say NO to a lot of other things if your goals are ambitious and you actually develop systems to move towards them.
Related
Hell Yea! or No
Hell Yea or No
Use this rule if you’re often over-committed or too scattered.
If you’re not saying “HELL YEAH!” about something, say no.
When deciding whether to do something, if you feel anything less than “Wow! That would be amazing! Absolutely! Hell yeah!” — then say no.
When you say no to most things, you leave room in your life to really throw yourself completely into that rare thing that makes you say “HELL YEAH!”
Every event you get invited to. Every request to start a new project. If you’re not saying “HELL YEAH!” about it, say no.
With that said while clear goals are important, they are the first step. Just having goals and dreams is like believing in law-of-attraction, sitting there in the same spot with your calibrated compass of clear direction. Not making any progress on the actions of actually climbing up the mountain where the compass is pointing towards.
Clear goal is the first step.
Necessary, Vital and… not enough by itself.
Hence, once you have determined the clear goal and ready to commit, you have determined the direction of the mountain top of the current clear goal. It’s time to design your systems and habits to align with that goal, so that your habits move you closer towards the peak of the mountain every day.
Systems & Habits determine the direction of where you are going. Goals are the thoughts and words that allow us to tailor our actions and habits to align us in the direction of where we want to be. Hyper successful people advocate for crisp goal clarity as first step, and then developing systems to achieve them.
Once you have calibrated the Direction, Then focus on Systems/Habits
Goals are important first step but there are Problems with goals without systems. Hence, we will aim to focus on systems after having a calibrated compass to point us towards where we want to go.
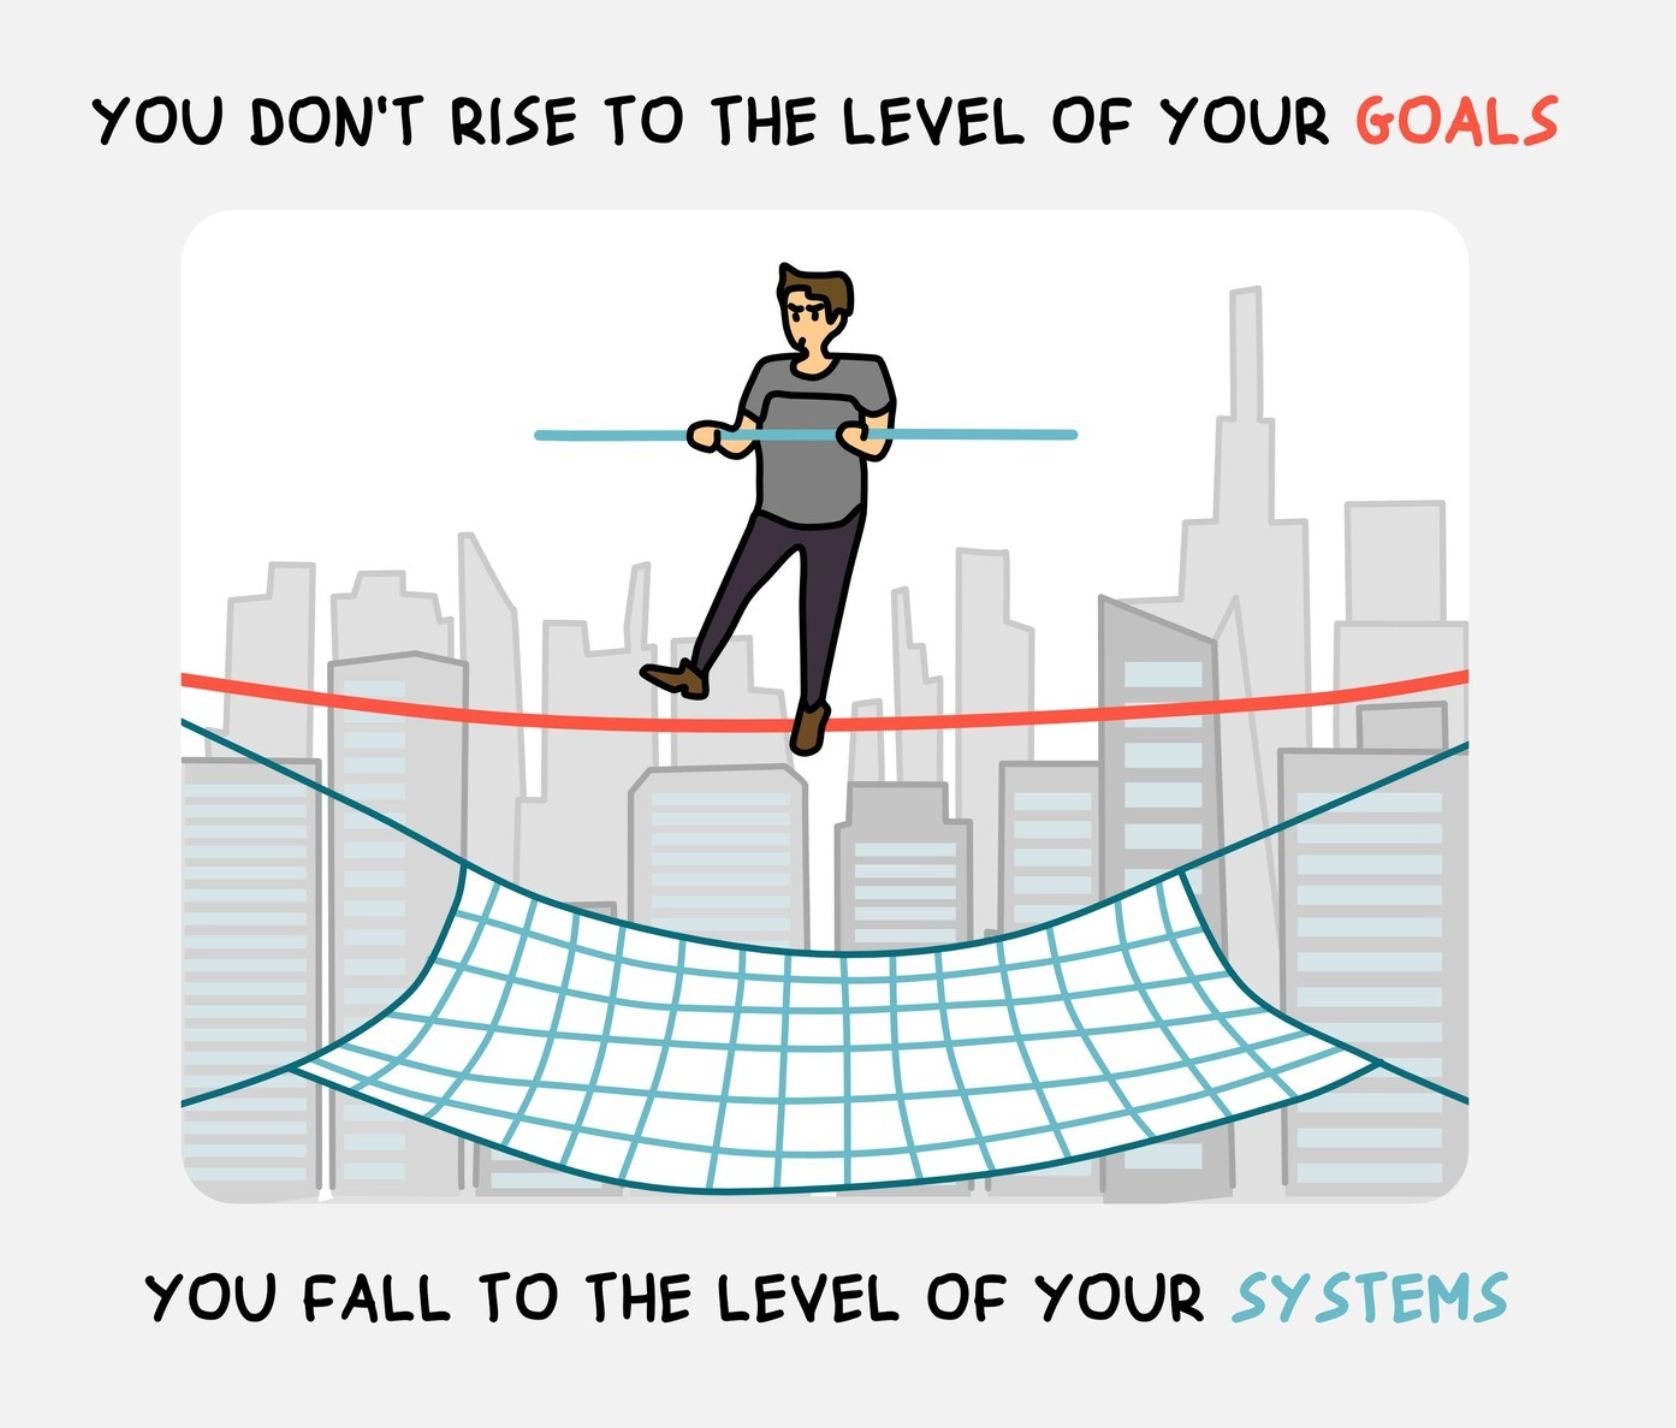
You do not rise to the level of your goals - You fall to the level of your systems
The Power of Systems Over Goals
The Essence of the Principle
Goals: The targets we aim to hit.
Example: “Win a marathon.”
Systems: The day-to-day behaviors and routines that define our progress.
Example: “Consistent training schedule and nutrition plan.”
Core Insights:
Achievement mirrors your systems, not your ambitions: Success is less about the goals you set and more about the systems you follow.
Build robust systems for inevitable success: The strength of your daily practices determines your level of achievement.
Focus on what you can control: Concentrate on your actions and behaviors, which are within your control, rather than on outcomes, which often aren’t.
Adaptability within systems leads to growth: Systems that allow for feedback and adjustment are more effective in reaching long-term success.
Developing Strong Systems:
Map out daily and weekly routines that align with your ultimate objectives.
Implement consistent habits that are directly linked to your areas of focus.
Regularly review and refine your systems based on outcomes and new insights.
Embrace an identity that reflects the processes of your systems.
The Fundamental Truth
Your level of success is a reflection of the systems you implement and maintain, not the height of your goals. By focusing on building effective systems, you ensure continuous progress and long-term achievement.
If successful and unsuccessful people share the same goals, then the goal cannot be what differentiates the winners from the losers.
Problems arise when you spend too much time thinking about your goals and not enough time designing your systems.
Problem #1: Winners and losers have the same goals.
Goal setting suffers from a serious case of survivorship bias. We concentrate on the people who end up winning—the survivors—and mistakenly assume that ambitious goals led to their success while overlooking all of the people who had the same objective but didn’t succeed.
Every Olympian wants to win a gold medal. Every candidate wants to get the job. And if successful and unsuccessful people share the same goals, then the goal cannot be what differentiates the winners from the losers. It wasn’t the goal of winning the Tour de France that propelled the British cyclists to the top of the sport. Presumably, they had wanted to win the race every year before—just like every other professional team. The goal had always been there. It was only when they implemented a system of continuous small improvements that they achieved a different outcome.
Losers have Goals and Dreams, Winners Have Systems
Problem #2: Achieving a goal is only a momentary change.
Imagine you have a messy room and you set a goal to clean it. If you summon the energy to tidy up, then you will have a clean room—for now. But if you maintain the same sloppy, pack-rat habits that led to a messy room in the first place, soon you’ll be looking at a new pile of clutter and hoping for another burst of motivation. You’re left chasing the same outcome because you never changed the system behind it. You treated a symptom without addressing the cause.
Achieving a goal only changes your life for the moment. That’s the counterintuitive thing about improvement. We think we need to change our results, but the results are not the problem. What we really need to change are the systems that cause those results. When you solve problems at the results level, you only solve them temporarily. In order to improve for good, you need to solve problems at the systems level. Fix the inputs and the outputs will fix themselves.
Problem #3: Goals restrict your happiness. (Happiness is in the future).
The implicit assumption behind any goal is this: “Once I reach my goal, then I’ll be happy.” The problem with a goals-first mentality is that you’re continually putting happiness off until the next milestone. I’ve slipped into this trap so many times I’ve lost count. For years, happiness was always something for my future self to enjoy. I promised myself that once I gained twenty pounds of muscle or after my business was featured in the New York Times, then I could finally relax.
Furthermore, goals create an “either-or” conflict: either you achieve your goal and are successful or you fail and you are a disappointment. You mentally box yourself into a narrow version of happiness. This is misguided. It is unlikely that your actual path through life will match the exact journey you had in mind when you set out. It makes no sense to restrict your satisfaction to one scenario when there are many paths to success.
A systems-first mentality provides the antidote. When you fall in love with the process rather than the product, you don’t have to wait to give yourself permission to be happy. You can be satisfied anytime your system is running. And a system can be successful in many different forms, not just the one you first envision.
Problem #4: Goals are at odds with long-term progress.
Finally, a goal-oriented mind-set can create a “yo-yo” effect. Many runners work hard for months, but as soon as they cross the finish line, they stop training. The race is no longer there to motivate them. When all of your hard work is focused on a particular goal, what is left to push you forward after you achieve it? This is why many people find themselves reverting to their old habits after accomplishing a goal.
The purpose of setting goals is to win the game. The purpose of building systems is to continue playing the game. True long-term thinking is goal-less thinking. It’s not about any single accomplishment. It is about the cycle of endless refinement and continuous improvement. Ultimately, it is your commitment to the process that will determine your progress.
“The problem happens when we have multiple desires. When we have fuzzy desires. When we want to do ten different things and we’re not clear about which is the one we care about.” - Naval-Ravikant
If you do not change direction; You may end up where you are heading
If you do not change direction. You may end up where you are heading — Lao-Tzu
“If you don’t know what you want, you end up with a lot you don’t.” - Chuck-Palahniuk, Fight Club
The world turns aside to let any man pass who knows where he is going. - Epictetus
A man should conceive of a legitimate purpose in his heart, and set out to accomplish it… He should make this purpose his supreme duty, and should devote himself to its attainment, not allowing his thoughts to wonder away into ephemeral fancies, longings and imaginings. This is the road to self-control and true concentration of thought. - from:As-a-Man-Thinketh by James-Allen
Aimlessness is a vice, and such drifting must not continue for him who would steer clear of catastrophe and destruction.
They who have no central purpose in their life fall an easy prey to pretty worries, fears, troubles and self-pityings, all of which are indications of weakness…
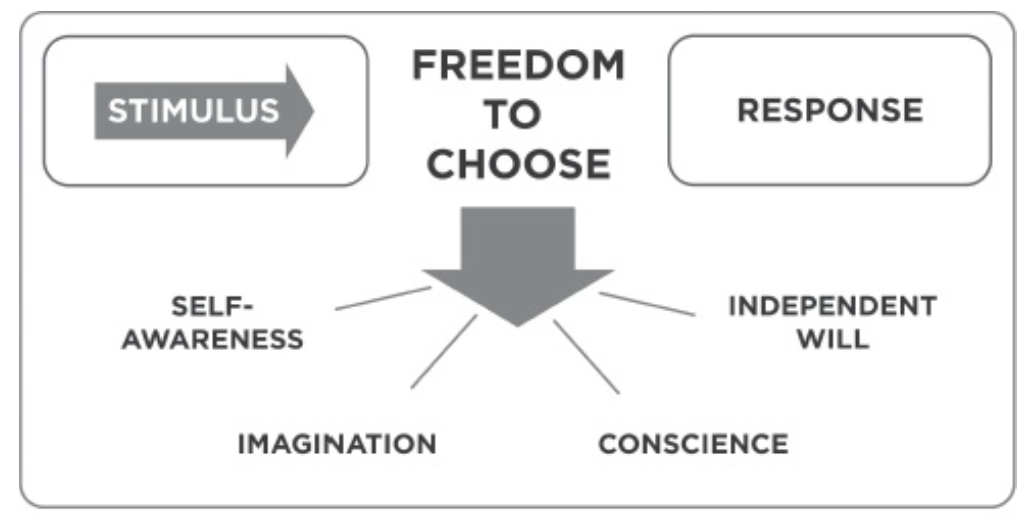
Look at the word responsibility—“response-ability”—the ability to choose your response. Highly proactive people recognize that responsibility. They do not blame circumstances, conditions, or conditioning for their behavior. Their behavior is a product of their own conscious choice, based on values, rather than a product of their conditions, based on feeling.
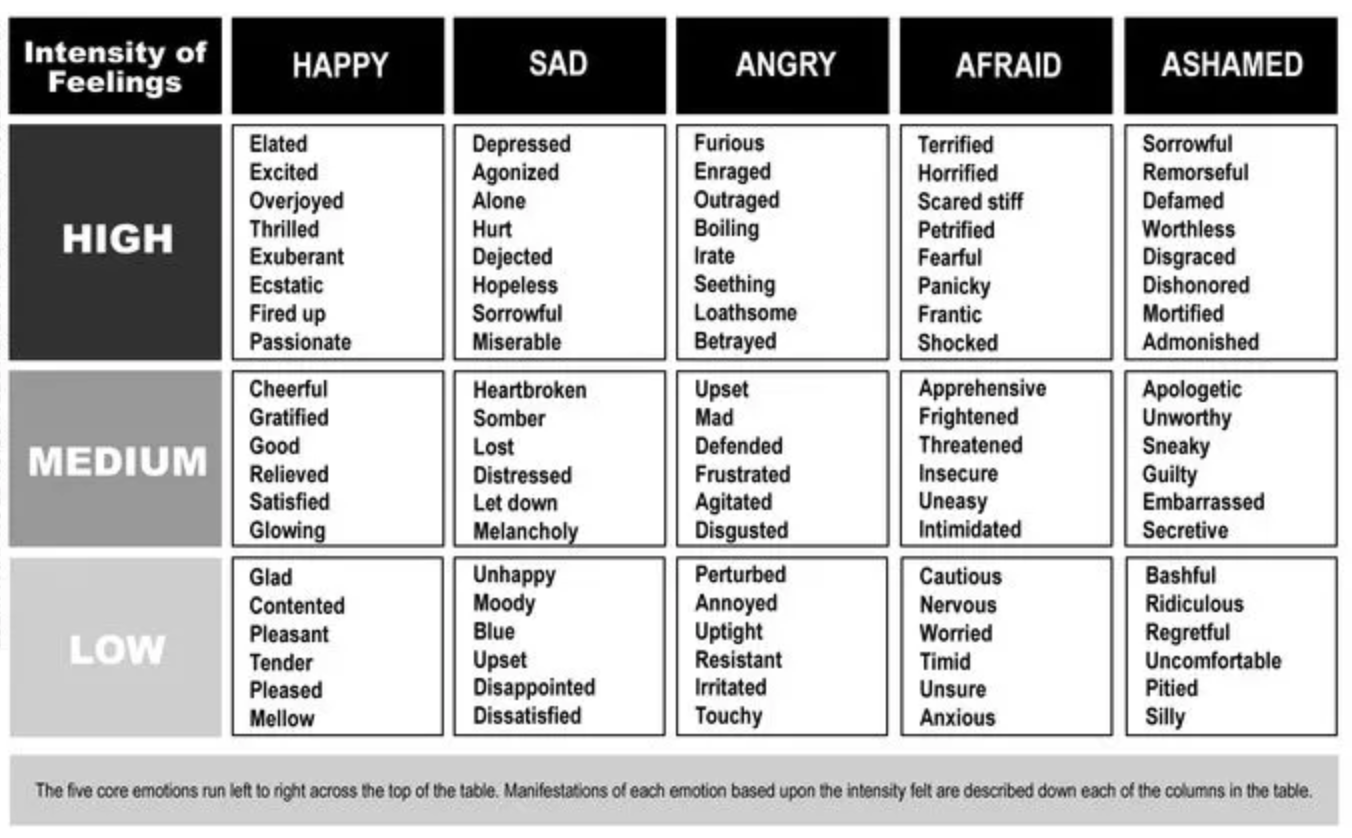
I choose to feel X..
Instead of saying:
  That [frustrated/annoyed/angered/...] me.
  OR I am [frustrated/annoyed/angered/...].

  Instead State: I CHOOSE to be [xxx/yyy] by this.
“Don’t worry. You don’t know enough to worry. That’s God’s truth. Who do you think you are that you should worry, for crying out loud? It’s a total waste of time. It presupposes such a knowledge of the situation that it is in fact a form of hubris.” - Terence-McKenna
Being Afraid of Death Is Ignorance
“To be afraid of death is only another form of thinking that one is wise when one is not; it is to think that one knows what one does not know. No one knows with regard to death whether it is not really the greatest blessing that can happen to a man; but people dread it as though they were certain that it is the greatest evil; and this ignorance, which thinks that it knows what it does not, must surely be ignorance most culpable.” — Plato
We don’t know whether something is good or bad in the long run.
A long time ago, a poor Chinese farmer lost a horse, and all the neighbors came around and said, “well that’s too bad.” The farmer said, “maybe.”
Shortly after, the horse returned bringing another horse with him, and all the neighbors came around and said, “well that’s good fortune,” to which the farmer replied, “maybe.”
The next day, the farmer’s son was trying to tame the new horse and fell, breaking his leg, and all the neighbors came around and said, “well that’s too bad,” and the farmer replied, “maybe.”
Shortly after, the emperor declared war on a neighboring nation and ordered all able-bodied men to come fight—many died or were badly maimed, but the farmer’s son was unable to fight and spared due to his injury. And all the neighbors came around and said, “well that’s good fortune,” to which the farmer replied, “maybe.”
The whole process of nature is an integrated process of immense complexity and it is really impossible to tell whether anything that happens in it is good or bad because you never know what will be the consequences of a misfortune or you never know what will be the consequences of good fortune. - Alan-Watts
Different breathing techniques can be very beneficial for combatting stress.
Firstly to mention breathing right throughout the day.
What is breathing right? Breathing right is breathing with your belly rather with your chest.
Belly Breathing
Belly Breathing/diaphragmatic Breathing and Stress
Combatting Stress Through Belly Diaphragmatic Breathing Throughout the Day
Belly Breathing
Diaphragmatic Breathing/Belly Breathing:
When practicing diaphragmatic breathing, the stomach, rather than the chest, moves with each breath, expanding while inhaling and contracting while exhaling. - uofmhealth.org
In simple words Diaphragmatic Breathing is breathing with your Belly, or Belly Breathing.
Here is a study that examined Belly Breathing. Which stated:
There was a significant interaction effect of group and time in the diaphragmatic breathing condition on cortisol levels, whereby the BIG [Belly Breather Group] had a significantly lower cortisol level after training - study
In the diaphragmatic breathing condition, there was a significant interaction effect of group by time on sustained attention, whereby the BIG showed significantly increased sustained attention after training, compared to baseline. - study
The above study makes you question why isn’t there a device that would encourage correct belly breathing.
A possible implementation would be the usage of piezoresistive fabric, worn as a wearable around the belly that would allow to give fairly accurate assessment of the whether the customer is correctly breathing or not.
Next to mention is not a very intense breathing technique that can be incorporated into daily morning routine or invoked upon when necessary throughout the day without being very intense: Cyclic Sighing.
Cyclic Sighing
Cyclic Sighing
This study compared the following methods for stress management:
And Highlighted “Cyclic Sighing” as the most effective method:
Double inhale through the nose. The first one is the complete inhale until your lungs feel full, and then you sneak in a little bit more air as a second inhale. And then a long slow exhale through the mouth. Until your lungs are completely empty. - Andrew-Huberman/short with huberman
There are interesting studies around Wim Hof Breathing.
For example study that showed that Autonomic nervous system and the immune system can be influenced voluntarily. (Here is a news story related to this study).
Also to note from the same study:
In the intervention group [Wim Hof Breathing], practicing the learned techniques resulted in intermittent respiratory alkalosis and hypoxia resulting in profoundly increased plasma epinephrine (adrenaline) levels. - study
Definitions for above quote
Respiratory alkalosis is a condition in which the pH of the blood becomes too alkaline (greater than 7.45) due to a decrease in the partial pressure of carbon dioxide (CO2) in the blood.
Hypoxia: the body is deprived of an adequate supply of oxygen.
increased plasma epinephrine levels: there is a higher amount of epinephrine (also known as adrenaline) present in the blood.
The results showed significantly different changes for the two groups, or trends toward significance, for each hormone (includes cortisol) over the 4 months. - study
Abstract: Stress has been implicated in both somatic and mental disorders. The mechanisms by which stress leads to poor health are largely unknown. However, studies in animals suggest that chronic stress causes high basal cortisol and low cortisol response to acute stressors and that such changes may contribute to disease. Previous studies of the Transcendental Meditation (TM) technique as a possible means of countering effects of stress have reported altered levels of several hormones both during the practice and longitudinally after regular practice of this technique. In this prospective, random assignment study, changes in baseline levels and acute responses to laboratory stressors were examined for four hormones-cortisol, growth hormone, thyroid-stimulating hormone and testosterone-before and after 4 months of either the TM technique or a stress education control condition. At pre- and post-test, blood was withdrawn continuously through an indwelling catheter, and plasma or serum samples were frozen for later analysis by radioimmunoassay. The results showed significantly different changes for the two groups, or trends toward significance, for each hormone over the 4 months. In the TM group, but not in the controls, basal cortisol level and average cortisol across the stress session decreased from pre- to post-test. Cortisol responsiveness to stressors, however, increased in the TM group compared to controls. The baselines and/or stress responsiveness for TSH and GH changed in opposite directions for the groups, as did the testosterone baseline. Overall, the cortisol and testosterone results appear to support previous data suggesting that repeated practice of the TM technique reverses effects of chronic stress significant for health. The observed group difference in the change of GH regulation may derive from the cortisol differences, while the TSH results are not related easily to earlier findings on the effects of chronic stress.
Scientists have found that regular participation in aerobic exercise has been shown to decrease overall levels of tension, elevate and stabilize mood, improve sleep, and improve self-esteem. About five minutes of aerobic exercise can begin to stimulate anti-anxiety effects. - adaa.org
Thus far for aerobic exercise (cardio, when your heart rate goes up), seems to be more important for brain function and stress management.
Testosterone may be increased in infertile men (who have a reduction in testosterone) and men undergoing strength training, but there is currently no evidence to suggest an inherent testosterone boosting effect in otherwise normal men. - https://examine.com/
This study is very interesting as it shows comparable anxiety reducing results from Silexan (lavendar extract) and lorazepam (benzodiazepine same class as Xanax). A low dose of lorazepam was used. But nonetheless the results are quite interesting.
In GAD (generalized anxiety disorder) silexan and lorazepamshowed comparable HAMA total score reductions.
However, a thing to note that the dosage of lorazepam used in the study is much lower than what would be typically prescribed for someone with anxiety disorder. A typical prescription of lorazepam is 2-6mg per day. While the study used 0.5mg of lorazepam. Nonetheless its an interesting piece of information to Silexan perform at the level of mini dose of benzodiazepine.
However, this other study states that there is not enough evidence of this sort of link.
Reporting of inclusion, demographic data, clinical data, and the potential for causality was found to be insufficient. This study did not find evidence to support the claim that tea tree essential oil is related to endocrine disruption in children, and little to no evidence to substantiate the proposed link between lavender essential oil and endocrine disruption in children. - [pubmed](https://pubmed.ncbi.nlm.nih.gov/32147050/
So often the stress is due to being too zoomed in on something that is out of control and assigned too much importance.
Look at larger span of time. Well past a day, a week or even a year.
Does being stressed create a habit of being stressed?
Look at 10 years. Is being stressed out right now help or hinder your 5-10 year plan?
How about 20 years? Is being perpetually stressed lead to health issues 20 years down the road? Or are you already dead due to being overly stressed?
Hence, zoom out. And with that viewpoint re-evaluate the importance. Do give it what you got (To regret). But don’t worry, while at it. Just do the best you can and leave the rest out of mind.
Ocean is a drop in the universe
Asia and Europe: are just small corners in the vast universe.
The ocean: a drop of water.
Mount Everest : a small pile of dirt in the grand scheme of things.
Realizing stress is a form of fear, admitting to yourself what you thought you were afraid of and working through that fear can be quite helpful.
How to get out of Fear
Reframe your way of thinking
Reframe your way of thinking, use cognitive distancing to see the same situation from a different view point.
Such as: Reframe thoughts as hypotheses
Reframe thoughts as hypotheses: Instead of treating a thought as a fact, you can treat it as a hypothesis that can be tested or questioned. For example, instead of thinking,
“I’m going to fail,”
you could think
“I have the thought that I might fail.”
Now you can:
Distance yourself from that thought.
Question the thought.
Or Use the third-person perspective
Use the third-person perspective: Try to look at your situation as if you were an outside observer. This can help you view your thoughts and emotions more objectively.
Visualize your thoughts
Visualize your thoughts: Imagine your thoughts as objects floating by on a stream, or as words written on leaves that are drifting away in the wind. This can help you see your thoughts as transient and separate from yourself.
Use visual submodalities
The visualization of thoughts advise is akin to whats called visual submodalities manipulation from nlp.
Hence, consider also consider manipulating your fears using visual submodalities to lessen the degree of your fears affecting you.
Visual Submodalities
Visual submodalities are the specific characteristics of our mental imagery. This includes aspects such as brightness, size, distance, and color, as well as the motion (or lack thereof), the image’s perspective, and whether it is viewed first-person or third-person.
Here are ways to adjust these visual submodalities to modify the intensity of their impact:
Increase Intensity
To intensify the emotional effect of a mental image, adjust its submodalities as follows:
Add motion: Make the image dynamic or moving.
Enhance brightness: Make the image brightly lit.
Enlarge: Increase the image’s size.
Saturate: Infuse the image with vibrant colors.
Decrease Intensity
To lessen the emotional effect of a mental image, manipulate its submodalities as follows:
Keep it static: Make the image stationary or still.
Diminish brightness: Make the image dim or dull.
Reduce size: Shrink the image to a smaller size.
Desaturate: Transform the image into black and white.
Why were you afraid? What made you overcome your fear?
What steps have you taken mentally to move past it?
Worst case scenario tactic
You can also use worst case scenario tactic. Imagine the worst case scenario. While imaging worst case and coping with it all of a sudden you realize the problem that you feared is not as large you have imagined.
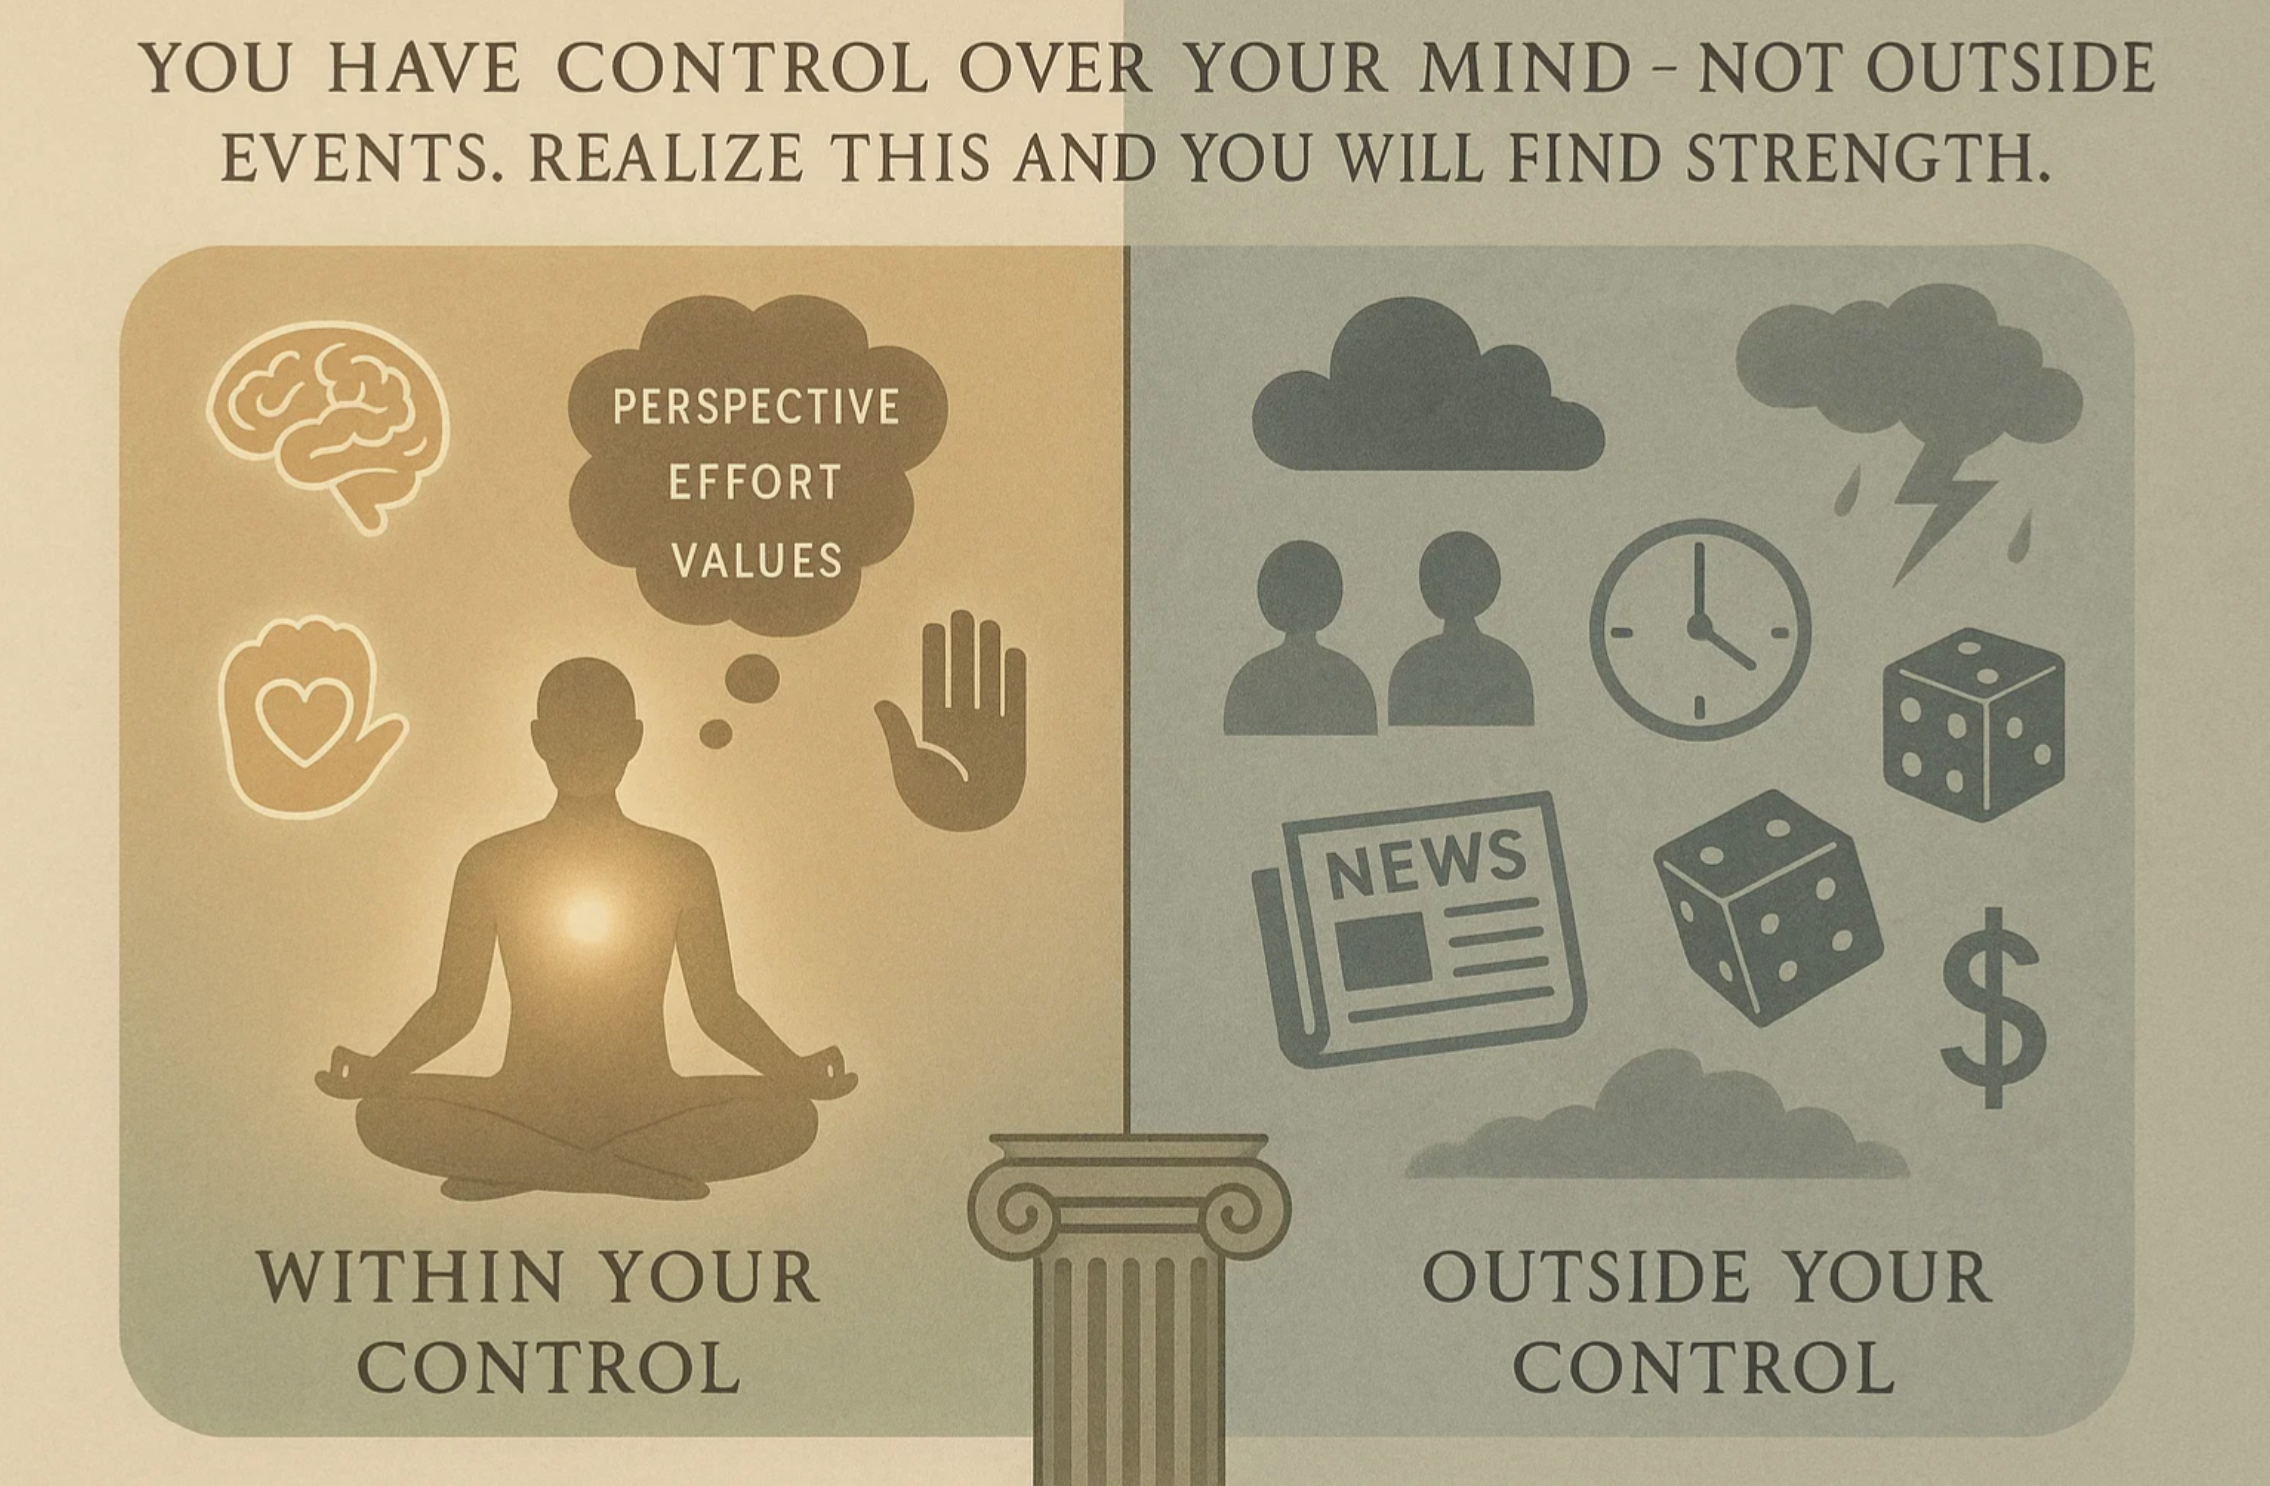
To separate in our minds what is within our control and what is not. Focusing on what is within our control and accepting what is not, thereby cultivating inner tranquility.
Stoicism emphasizes the importance of personal virtue, emotional resilience, and understanding the nature of the world through reason, all as means to achieve a content and fulfilled life.
We Control Our Mind Not Outside Events
“You have control over your mind and not outside events, Realize this and you will find strength.” - Marcus-Aurelius
We don’t control what happens to us, but we do control how we react to it. - Ryan-Holiday
Some things we can control, some we can’t.
…
What we can control naturally is not governed, restricted or constrained by others; what we can’t control is naturally governed, restricted and constrained by others. - The-Manual-Enchiridion
Happiness is to not be dependant on externals
The essence of philosophy is to not depend on external things for happiness
The essence of philosophy is that a man should so live that his happiness shall depend as little as possible on external things. - audio/Epictetus
Stoic exercises such as Memento Mori can be very useful to take you out of spinning in the mundane and looking at things with different vantage point.
Memento Mori: Remember Death
Memento Mori - Remember That you will Die.
The idea of Memento Mori is to remind us that we do not have control over our fate. We can die later today, tomorrow, 80 years from now, or anytime in between. It’s not up to us. The only thing we can be sure of is that it will happen.
It is important to accept this fact, so we can fully embrace the moment we are in. We shouldn’t put things off until tomorrow because
we may not have tomorrow.
One day we definitely won’t have a tomorrow and that day could be today. The memento mori is a regular reminder of this fact.
If we keep this fact in mind we will love those around us more deeply because we will treat every moment with those we love as the last moment we will ever have with them. Our work is better because we will treat everything as the last thing we will ever do and I want the last thing I do to be something beautiful. We won’t be afraid to try new things or experiences because we may never have another chance. - ref/reddit
Photorealistic memento mori, 9:16 vertical: Industrial hourglass with vault door aesthetic, aged brass, cracked glass. Upper chamber: luxury items (Rolex, Mercedes, gold bars, cash, stocks) disintegrating to ash mid-air. Lower chamber: ash mountains, ghostly text “postponed” “someday” “when I retire”. DOZENS of translucent gray hands surrounding hourglass, emerging from darkness, reaching desperately, clutching dissolving coins, holding fading SOMEDAY calendars, hands turning to smoke from fingertips inward, filling the space around hourglass with overwhelming sense of regret. Background: weathered clock showing “NOW” twelve times. Dramatic Caravaggio lighting from above, oppressive shadows, museum-quality photography, NOT cartoon, hyper-realistic, dark confrontational tone, film grain, high contrast, no titles, no text overlays —ar 9:16 —style raw —v 6
Accepting death’s inevitability means accepting your only certain future. The more we embrace our mortality, the lessfearwe have in our life. It’s paradoxical how confronting death brings deeper tranquility.
“You could leave life right now. Let that determine what you do and say and think.” — Marcus-Aurelius
“The final hour when we cease to exist does not itself bring death; it merely of itself completes the death-process.” — seneca
“We have two lives and the second begins when we realize we only have one.” — Confucius
“With regard to everything that you enjoy, find useful, or love, keep their nature in mind, starting with the smallest things. If you have a favorite coffee cup, remember that it’s a cup; then if it’s broken, you can stand it. When you hug your child or your spouse, remember that it’s a mortal human being you’re hugging; then if that person dies, you can stand it.” - Epictetus/3
“Keep before your eyes from day to day death and exile and all things that seem terrible, but death most of all, and then you will never set your thoughts on what is low and will never desire anything beyond measure.” — Epictetus
“Everything transitory—the knower and the known.” — Marcus-Aurelius
Being Afraid of Death Is Ignorance
“To be afraid of death is only another form of thinking that one is wise when one is not; it is to think that one knows what one does not know. No one knows with regard to death whether it is not really the greatest blessing that can happen to a man; but people dread it as though they were certain that it is the greatest evil; and this ignorance, which thinks that it knows what it does not, must surely be ignorance most culpable.” — Plato
“Death smiles at us all; all we can do is smile back.” - Depiction of Marcus-Aurelius in Gladiator
“As you kiss your son good night, whisper to yourself, “He may be dead in the morning.” Don’t tempt fate, you say. By talking about a natural event? Is fate tempted when we speak of grain being reaped?” - Epictetus
“Stop whatever you are doing and ask yourself: Am I afraid of death because I won’t be able to do this anymore?” - Marcus-Aurelius
You want to live but do you know how to live? You are scared of dying and tell me, is the kind of life you lead really any different than being dead? - seneca
“It is not death that a man should fear, but he should fear never beginning to live according to nature.” - Marcus-Aurelius
If you’re desensitized to the fact that you’re going to die, consider it a different way. As far as you’re concerned, this world is going to end. Now what? - Naval-Ravikant
If we kept in mind that we will soon inevitably die, our lives would be completely different. - Tolstoy
Related
Basic Truth: We Have a Finite Amount of Time
Basic Truth: We Have a Finite Amount of Time.
It is a basic truth that we have largely become desensitized to.
We have a finite amount of time and we do not know when it is going to run out.
If you can’t establish confidence and there is something that you do “need to be” worried about, THEN instead-be:concerned about it, and take action towards resolution rather than be worried. waste-time with worrying.
worry
Definition: Spinning thoughts, that give you negative feeling and produce NO ACTION.
Worry is Absurd (if you think of all that can happen)
Nothing but what you get from first impressions. That someone has insulted you, for instance. That -but not that it’s done you any harm. The fact that my son is sick -that I can see. But “that he might die of it”, no. Stick with first impressions. Don’t extrapolate. And nothing can happen to you.
Or extrapolate. From a knowledge of all that can happen in the world. - Marcus-Aurelius
If you are going to worry than why limit yourself. Worry about everything that can happen. Then start worrying about a meteor that could fall tomorrow that hasn’t been announced to the public.
Worry is weakness
Aimlessness-is-a-vice
Aimlessness is a vice, and such drifting must not continue for him who would steer clear of catastrophe and destruction.
They who have no central purpose in their life fall an easy prey to pretty worries, fears, troubles and self-pityings, all of which are indications of weakness…
Worry is like a rocking chair: it gives you something to do but never gets you anywhere. — Erma Bombeck
Which of you, by being anxious, can add one moment to his lifespan? — Matthew 6:27
If the problem can be solved why worry? If the problem cannot be solved worrying will do you no good.
― Shantideva (Buddhist Monk)
If we are able to overcome our anxieties and forge a fearless attitude towards life, something strange and remarkable can occur—that margin of control over circumstance increases. — Robert-Greene
To establish an anti-worry mindset. A mindset to free yourself from useless spinning thoughts that do not produce action. Start with Laser focus on what you control.
(Verse 1)
The screen it glows, a siren’s call,
LinkedIn scrolls, YouTube enthralls,
The news feed whispers, “Just one peek,”
But that’s the path of the lost and weak.
My goal is etched, a beacon bright,
No time for shadows, only light.
(Chorus)
Laser focus, cut right through the haze,
These fleeting clicks, a pointless maze.
No cheap dopamine, no wasted time,
My energy climbs, my vision’s prime.
LinkedIn can wait, the news can fade,
My true work’s calling, unafraid.
(Verse 2)
Each moment precious, can’t be bought,
Distractions battle, fiercely fought.
The pull is strong, the comfort’s there,
But empty comfort, a gilded snare.
My compass set, on what I control,
To reach the summit, body and soul.
(Chorus)
Laser focus, cut right through the haze,
These fleeting clicks, a pointless maze.
No cheap dopamine, no wasted time,
My energy climbs, my vision’s prime.
LinkedIn can wait, the news can fade,
My true work’s calling, unafraid.
(Bridge)
The doubt may creep, a whisper low,
“Is this worth it? Should I let go?”
But in that stillness, I recall,
The greater purpose, standing tall.
(Chorus)
Laser focus, cut right through the haze,
These fleeting clicks, a pointless maze.
No cheap dopamine, no wasted time,
My energy climbs, my vision’s prime.
LinkedIn can wait, the news can fade,
My true work’s calling, unafraid.
(Outro)
Focus. Build. Achieve.
No more diversions, I believe.
Focusing on Variables outside control is Stealing Time from Actions
If we allow ourselves to focus on variables outside of our control, we invariably take the focus from things we can change. In other words: When you think about things outside of your control, you take resources away from things that can make your life better.
You have a finite amount of time and if you focus on that you cannot change, you steal time away from actions that bring change to your life.
IF: You focus on what you cannot change
  THEN: you steal time away, from actions that bring change.
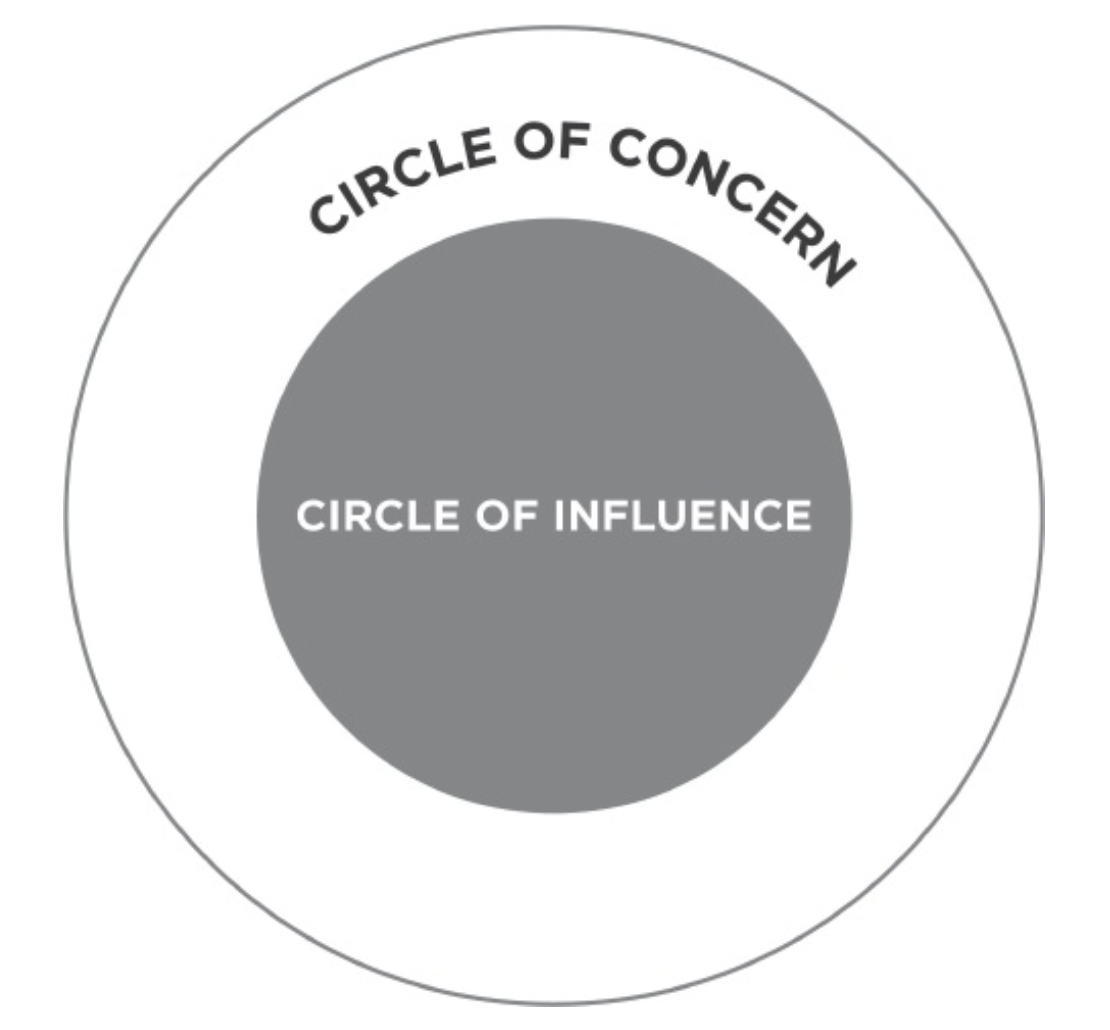
As you focus on what you control, your circle-of-influence (what you control), increases.
Inversely if you focus on what you cannot change your circle of influence decreases.
Focusing on variables outside of your control is stealing time from the finite amount of time that you have left.
Hence, focus on what you can control. Think about what you can control. Laser focus on variables under your control. Focus on your actions, focus on your inputs into this life, and take the outputs to re-evaluate your input actions.
Control The Type of Information You Intake
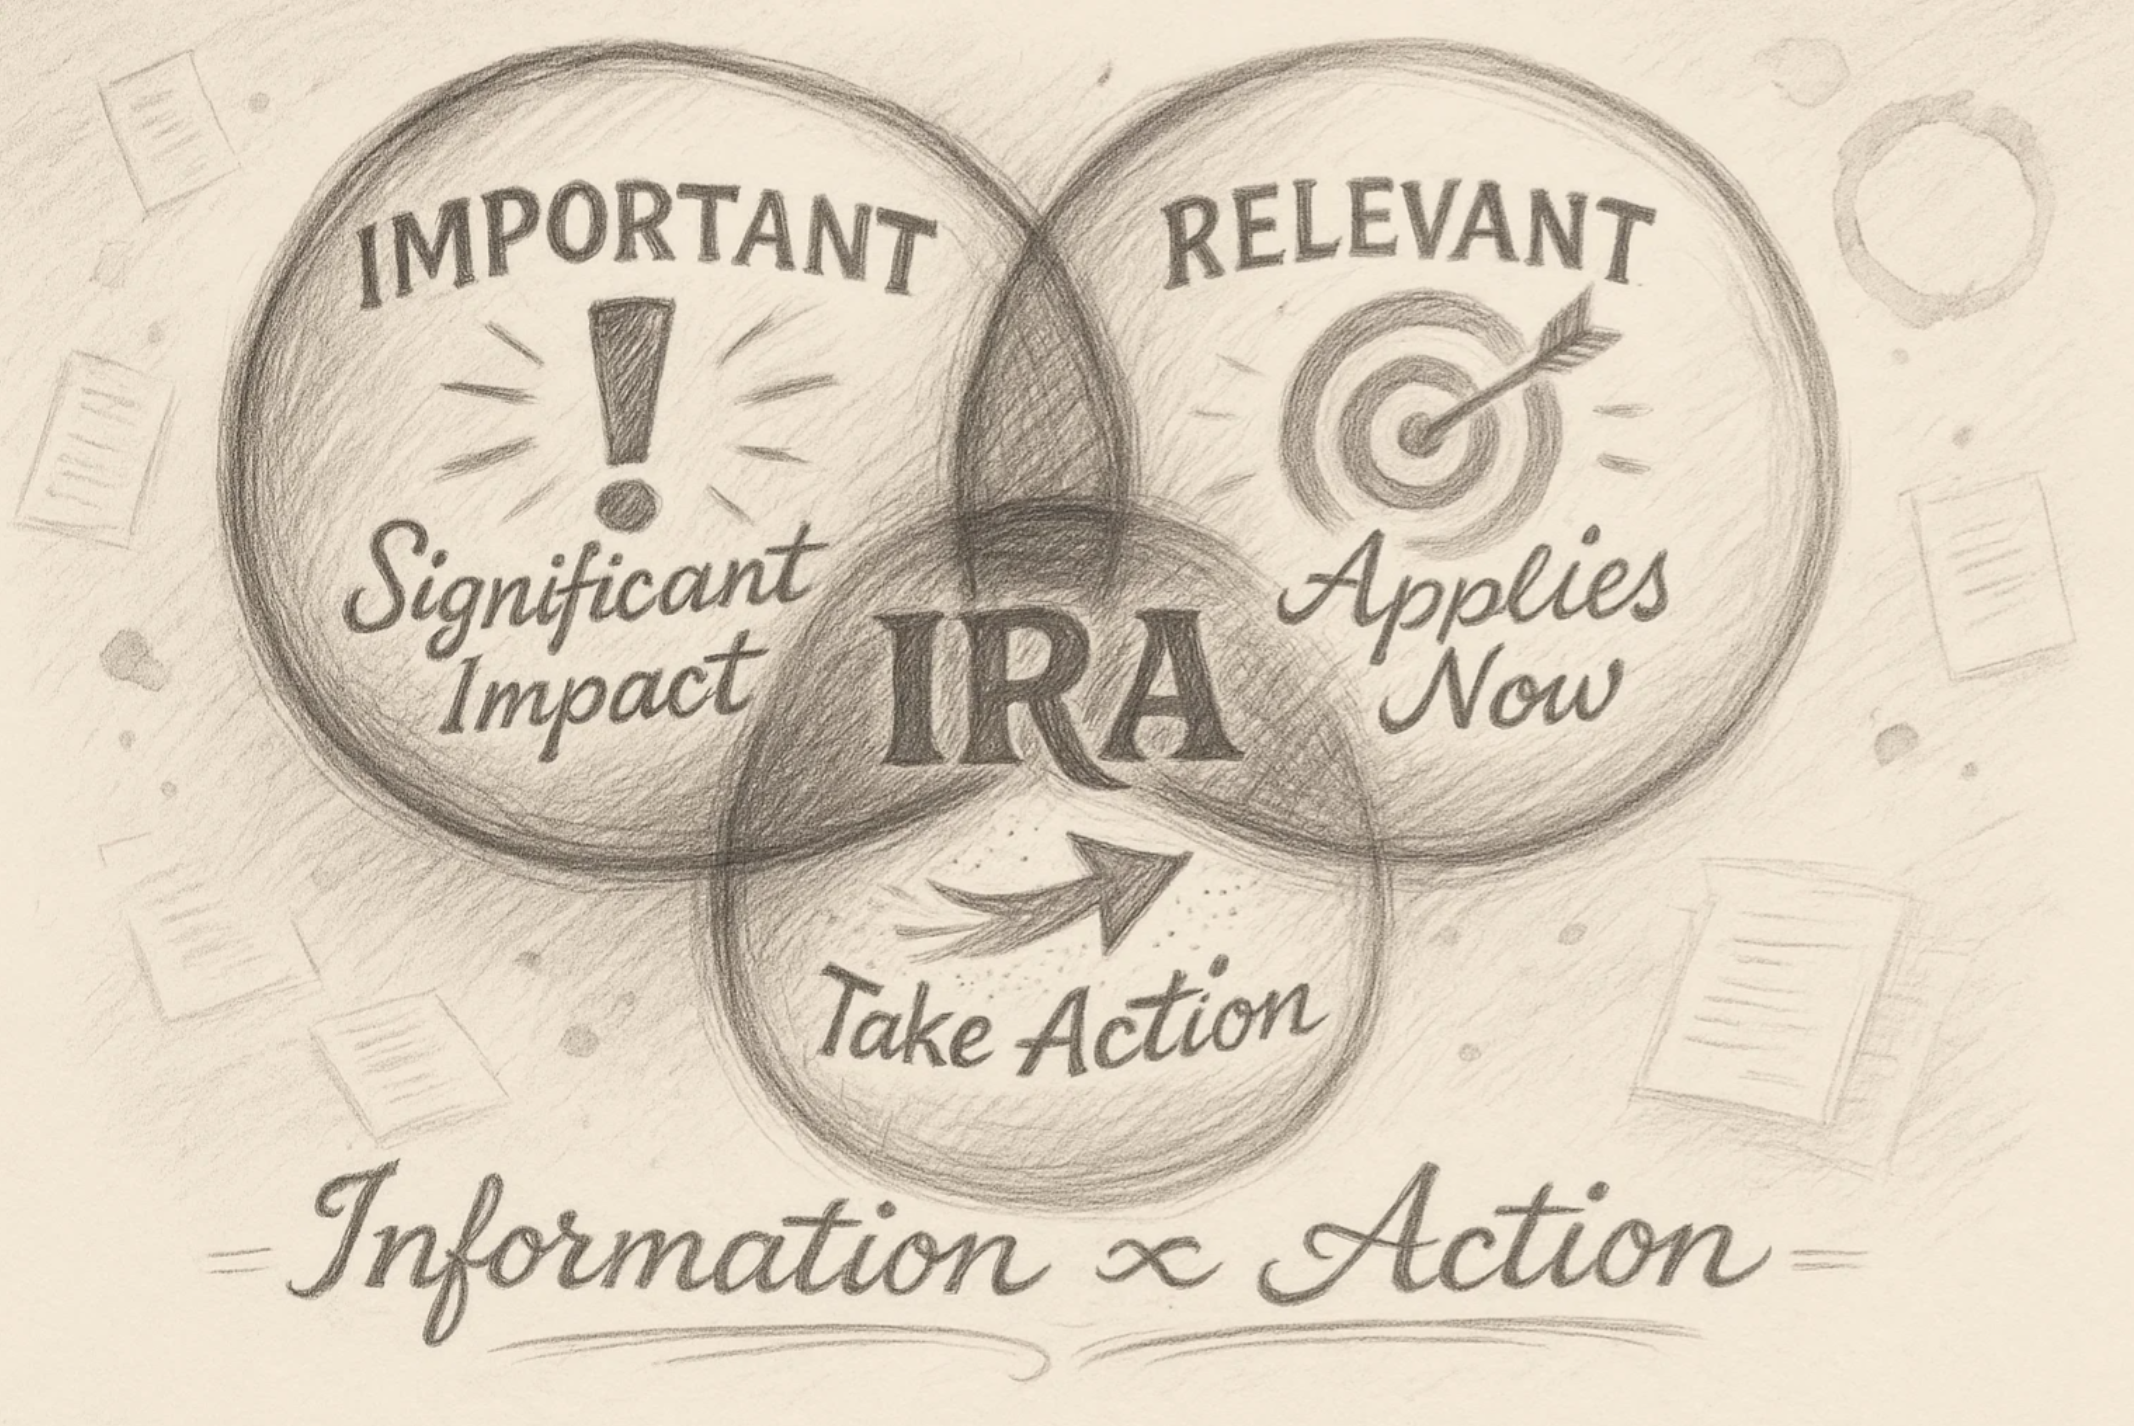
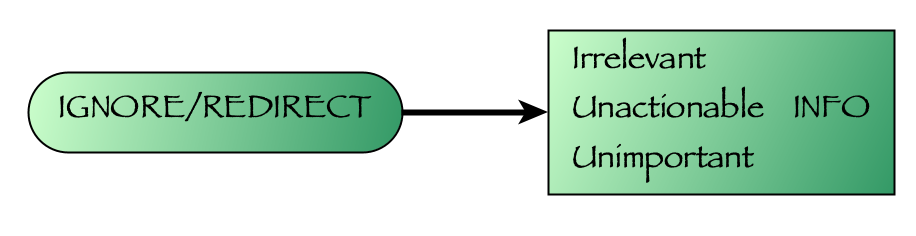
It becomes easier to focus on things that are under our control when we filter the type of information coming our way. When we limit the information to IRA-INFO - Important Relevant Actionable Information, most importantly actionable, then our mind tends to gravitate towards thoughts that are also actionable.
On the opposite end of the spectrum if we take in information that is in-actionable, then we are more likely to have negative thoughts with zero action output == worry. Mainstream media is great example of in-actionable often fear focused information, that is likely to use up thought cycles with no positive outcomes (For more refer to Manufacturing-consent). Hence, in typical situations it’s best to be ignorant of such information, the important news of the world will reach you through other people.
Important Relevant Actionable Information (IRA Info)
Information must be proportionate to action, particularly habitual consumption of information.
What information consumes is rather obvious: it consumes the attention of its recipients. Hence, a wealth of information creates a poverty of attention and a need to allocate that attention efficiently among the overabundance of information sources that might consume it. — Herbert Simon, recipient of Nobel Memorial Prize in Economics
Wealth of Information --creates--> Poverty of Attention
Most importantly: Information Must be Actionable
Information Must BE Actionable
Most important part of Tim Ferris’s IRA filter is the actionable filter. If the information is not actionable then avoid the consumption of it.
It’s unproductive to seek out information such as world daily news for the sake of being “Informed”. That’s just stealing time from learning something that can actually move you forward in life.
I never watch the news and have bought one single newspaper in the last five years…In five years, I haven’t had a single problem due to this selective ignorance. - Tim Ferris
For actionable information, I consume a maximum of one-third of
one industry magazine (Response magazine) and one business magazine (Inc.) per month, for a grand total of approximately four hours/month. That’s it for results-oriented
reading. - Tim Ferris
Lifestyle design is based on massive action—output. Increased output necessitates decreased input.
Most information is time-consuming, negative, irrelevant to your goals, and outside of your influence.
I challenge you to look at whatever you read or watched today and tell me that it wasn’t at least two of the four. - Tim Ferris
Develop the habit of asking yourself, “Will I definitely use this information for something immediate and important?” It’s not enough to use information for “something”—it needs to be immediate and important. If “no” on either count, don’t consume it. Information is useless if it is not applied to something important or if you will forget it before you have a chance to apply it. - Tim Ferris
How to Grasp Specific Information
How to Grasp Specific Information: By Tim Ferris
How to Grasp Specific Info by Tim Ferris
IF task is "how-to" in nature:
  THEN: only read autobiographical accounts of “how I did it”.
    No speculators
    No wannabes
What if you need to learn to do something
your friends haven’t done? Like, say, sell a book to the world’s largest publisher as a
first-time author? Funny you should ask. There are two approaches I used:
I picked one book out of dozens based on reader reviews and the fact that the
authors had actually done what I wanted to do. If the task is how-to in nature, I only
read accounts that are “how I did it” and autobiographical. No speculators or
wannabes are worth the time.
Using the book to generate intelligent and specific questions, I contacted 10 of the top authors and agents in the world via e-mail and phone, with a response rate of 80%. I only read the sections of the book that were relevant to immediate next steps, which took less than two hours. To develop a template e-mail and call script took approximately four hours, and the actual e-mails and phone calls took less than an hour. This personal contact approach is not only more effective and more efficient than all-you-can-eat info buffets, it also provided me with the major league alliances and mentors necessary to sell this book. Rediscover the power of the forgotten skill called “talking.” It works. Once again, less is more. - Tim Ferris
Remember: If you can do something about a situation, then do not worry about it. Instead, go and enact change. If you cannot do anything, then do not worry about it. Instead, find something that you can change.
Quotes
“The chief task in life is simply this: to identify and separate matters so that I can say clearly to myself which are externals not under my control, and which have to do with the choices I actually control. Where then do I look for good and evil? Not to uncontrollable externals, but within myself to the choices that are my own” - Epictetus
“First understand the do-or-die importance of focus. If you don’t learn to focus, you will have a shallow and unrewarding life without any meaningful achievements. So make it a priority.” — Derek-Sivers
You train to be in the mindset of doing. The lens you look at the world focuses on things that you can change. And hence your perception of the world becomes that the world (your world) is changing and you see yourself as being able to influence the change.
You do not rise to the level of your goals - You fall to the level of your systems
The Power of Systems Over Goals
The Essence of the Principle
Goals: The targets we aim to hit.
Example: “Win a marathon.”
Systems: The day-to-day behaviors and routines that define our progress.
Example: “Consistent training schedule and nutrition plan.”
Core Insights:
Achievement mirrors your systems, not your ambitions: Success is less about the goals you set and more about the systems you follow.
Build robust systems for inevitable success: The strength of your daily practices determines your level of achievement.
Focus on what you can control: Concentrate on your actions and behaviors, which are within your control, rather than on outcomes, which often aren’t.
Adaptability within systems leads to growth: Systems that allow for feedback and adjustment are more effective in reaching long-term success.
Developing Strong Systems:
Map out daily and weekly routines that align with your ultimate objectives.
Implement consistent habits that are directly linked to your areas of focus.
Regularly review and refine your systems based on outcomes and new insights.
Embrace an identity that reflects the processes of your systems.
The Fundamental Truth
Your level of success is a reflection of the systems you implement and maintain, not the height of your goals. By focusing on building effective systems, you ensure continuous progress and long-term achievement.
If successful and unsuccessful people share the same goals, then the goal cannot be what differentiates the winners from the losers.
Problems arise when you spend too much time thinking about your goals and not enough time designing your systems.
Problem #1: Winners and losers have the same goals.
Goal setting suffers from a serious case of survivorship bias. We concentrate on the people who end up winning—the survivors—and mistakenly assume that ambitious goals led to their success while overlooking all of the people who had the same objective but didn’t succeed.
Every Olympian wants to win a gold medal. Every candidate wants to get the job. And if successful and unsuccessful people share the same goals, then the goal cannot be what differentiates the winners from the losers. It wasn’t the goal of winning the Tour de France that propelled the British cyclists to the top of the sport. Presumably, they had wanted to win the race every year before—just like every other professional team. The goal had always been there. It was only when they implemented a system of continuous small improvements that they achieved a different outcome.
Losers have Goals and Dreams, Winners Have Systems
Problem #2: Achieving a goal is only a momentary change.
Imagine you have a messy room and you set a goal to clean it. If you summon the energy to tidy up, then you will have a clean room—for now. But if you maintain the same sloppy, pack-rat habits that led to a messy room in the first place, soon you’ll be looking at a new pile of clutter and hoping for another burst of motivation. You’re left chasing the same outcome because you never changed the system behind it. You treated a symptom without addressing the cause.
Achieving a goal only changes your life for the moment. That’s the counterintuitive thing about improvement. We think we need to change our results, but the results are not the problem. What we really need to change are the systems that cause those results. When you solve problems at the results level, you only solve them temporarily. In order to improve for good, you need to solve problems at the systems level. Fix the inputs and the outputs will fix themselves.
Problem #3: Goals restrict your happiness. (Happiness is in the future).
The implicit assumption behind any goal is this: “Once I reach my goal, then I’ll be happy.” The problem with a goals-first mentality is that you’re continually putting happiness off until the next milestone. I’ve slipped into this trap so many times I’ve lost count. For years, happiness was always something for my future self to enjoy. I promised myself that once I gained twenty pounds of muscle or after my business was featured in the New York Times, then I could finally relax.
Furthermore, goals create an “either-or” conflict: either you achieve your goal and are successful or you fail and you are a disappointment. You mentally box yourself into a narrow version of happiness. This is misguided. It is unlikely that your actual path through life will match the exact journey you had in mind when you set out. It makes no sense to restrict your satisfaction to one scenario when there are many paths to success.
A systems-first mentality provides the antidote. When you fall in love with the process rather than the product, you don’t have to wait to give yourself permission to be happy. You can be satisfied anytime your system is running. And a system can be successful in many different forms, not just the one you first envision.
Problem #4: Goals are at odds with long-term progress.
Finally, a goal-oriented mind-set can create a “yo-yo” effect. Many runners work hard for months, but as soon as they cross the finish line, they stop training. The race is no longer there to motivate them. When all of your hard work is focused on a particular goal, what is left to push you forward after you achieve it? This is why many people find themselves reverting to their old habits after accomplishing a goal.
The purpose of setting goals is to win the game. The purpose of building systems is to continue playing the game. True long-term thinking is goal-less thinking. It’s not about any single accomplishment. It is about the cycle of endless refinement and continuous improvement. Ultimately, it is your commitment to the process that will determine your progress.
Proactive people focus their efforts in the Circle of Influence. They work on the things they can do something about. The nature of their energy is positive, enlarging and magnifying, causing their Circle of Influence to increase.
Anytime we think the problem is “out there,” that thought is the problem. We empower what’s out
there to control us. The change paradigm is “outside-in”—what’s out there has to change before we can change.
Related Quotes
“The ignorant man’s position and character is this: he never looks to himself for benefit or harm, but to the world outside him. The philosopher’s position and character is that he always look to himself for benefit and harm.” — Epictetus, Enchiridion
God grant me the serenity to accept the things I cannot change, courage to change the things I can change; and wisdom to know the difference. - Serenity Prayer
Imagine you’re dealing with someone who’s hoarding. Now, people who are hoarding are often older, or neurologically damaged, or have obsessive-compulsive disorder. Then, you walk into their house and find around 10,000 items. There are maybe a hundred boxes. You open a box, and inside, there’s a mix of pens, old passports, checks, a collection of silver dollars, some hypodermic needles, dust, and even a dead mouse. The house is filled with boxes like that—absolute chaos. Not order. Chaos.
You might wonder, is that their house? Or Is that their being? Is that their mind? The answer is: there’s no difference. So, if you want to organize your psyche, you could start by organizing your room. This might be easier, especially if you’re a more concrete person and need something concrete to begin with.
So you go clean up under your bed and you make your bed and you organize the papers on your desk. And you think well just exactly what are you organizing? Are you organizing the objective world, or are you organizing your field of being—your field of total experience? Jung believed that, and I think there’s a Buddhist doctrine nested in there, that at the highest level of psychological integration, there’s no difference between you and what you experience.
Now, you might think, “Well, I can’t control everything I experience,” but that’s no objection because you can’t control yourself entirely anyway. So, the mere fact that you can’t extend control over everything you experience is no argument against the idea that you should still treat that as an extension of yourself.- Jordan-Peterson/video: reference
[people reach out about] How starting to clean up their room changed their life is quite fun because it’s something I always tell people to do instead of going out and protesting. If you want to change the world, you start from yourself and work outward because you build your competence that way. It’s like, I don’t know how you can go out and protest the structure of the entire economic system if you can’t keep your room organized.- Jordan-Peterson/video ref
If we don’t cultivate indifference/ignorance to things that are outside of our control we are at risk of inviting worry into our life.
If we don’t cultivate selective ignorance we are at risk of being dispersed, not being able to produce massive action. Due to not being able to laser focus on things that are within our control.
To be indifferent to what makes no difference
“To be indifferent to what makes no difference.” - Marcus-Aurelius
To be indifferent to what makes no difference while stepping up to fulfill the duties of the relationships you currently have with society and family (justice).
With regard to everything that you enjoy, find useful, or love, keep their nature in mind, starting with the smallest things. If you have a favorite coffee cup, remember that it’s a cup; then if it’s broken, you can stand it. When you hug your child or your spouse, remember that it’s a mortal human being you’re hugging; then if that person dies, you can stand it. - Epictetus
The idea of Memento Mori is to remind us that we do not have control over our fate. We can die later today, tomorrow, 80 years from now, or anytime in between. It’s not up to us. The only thing we can be sure of is that it will happen.
It is important to accept this fact, so we can fully embrace the moment we are in. We shouldn’t put things off until tomorrow because
we may not have tomorrow.
One day we definitely won’t have a tomorrow and that day could be today. The memento mori is a regular reminder of this fact.
If we keep this fact in mind we will love those around us more deeply because we will treat every moment with those we love as the last moment we will ever have with them. Our work is better because we will treat everything as the last thing we will ever do and I want the last thing I do to be something beautiful. We won’t be afraid to try new things or experiences because we may never have another chance. - ref/reddit
Photorealistic memento mori, 9:16 vertical: Industrial hourglass with vault door aesthetic, aged brass, cracked glass. Upper chamber: luxury items (Rolex, Mercedes, gold bars, cash, stocks) disintegrating to ash mid-air. Lower chamber: ash mountains, ghostly text “postponed” “someday” “when I retire”. DOZENS of translucent gray hands surrounding hourglass, emerging from darkness, reaching desperately, clutching dissolving coins, holding fading SOMEDAY calendars, hands turning to smoke from fingertips inward, filling the space around hourglass with overwhelming sense of regret. Background: weathered clock showing “NOW” twelve times. Dramatic Caravaggio lighting from above, oppressive shadows, museum-quality photography, NOT cartoon, hyper-realistic, dark confrontational tone, film grain, high contrast, no titles, no text overlays —ar 9:16 —style raw —v 6
Accepting death’s inevitability means accepting your only certain future. The more we embrace our mortality, the lessfearwe have in our life. It’s paradoxical how confronting death brings deeper tranquility.
“You could leave life right now. Let that determine what you do and say and think.” — Marcus-Aurelius
“The final hour when we cease to exist does not itself bring death; it merely of itself completes the death-process.” — seneca
“We have two lives and the second begins when we realize we only have one.” — Confucius
“With regard to everything that you enjoy, find useful, or love, keep their nature in mind, starting with the smallest things. If you have a favorite coffee cup, remember that it’s a cup; then if it’s broken, you can stand it. When you hug your child or your spouse, remember that it’s a mortal human being you’re hugging; then if that person dies, you can stand it.” - Epictetus/3
“Keep before your eyes from day to day death and exile and all things that seem terrible, but death most of all, and then you will never set your thoughts on what is low and will never desire anything beyond measure.” — Epictetus
“Everything transitory—the knower and the known.” — Marcus-Aurelius
Being Afraid of Death Is Ignorance
“To be afraid of death is only another form of thinking that one is wise when one is not; it is to think that one knows what one does not know. No one knows with regard to death whether it is not really the greatest blessing that can happen to a man; but people dread it as though they were certain that it is the greatest evil; and this ignorance, which thinks that it knows what it does not, must surely be ignorance most culpable.” — Plato
“Death smiles at us all; all we can do is smile back.” - Depiction of Marcus-Aurelius in Gladiator
“As you kiss your son good night, whisper to yourself, “He may be dead in the morning.” Don’t tempt fate, you say. By talking about a natural event? Is fate tempted when we speak of grain being reaped?” - Epictetus
“Stop whatever you are doing and ask yourself: Am I afraid of death because I won’t be able to do this anymore?” - Marcus-Aurelius
You want to live but do you know how to live? You are scared of dying and tell me, is the kind of life you lead really any different than being dead? - seneca
“It is not death that a man should fear, but he should fear never beginning to live according to nature.” - Marcus-Aurelius
If you’re desensitized to the fact that you’re going to die, consider it a different way. As far as you’re concerned, this world is going to end. Now what? - Naval-Ravikant
If we kept in mind that we will soon inevitably die, our lives would be completely different. - Tolstoy
Related
Basic Truth: We Have a Finite Amount of Time
Basic Truth: We Have a Finite Amount of Time.
It is a basic truth that we have largely become desensitized to.
We have a finite amount of time and we do not know when it is going to run out.
If you knew how things would turn out would you worry? The interesting part is that we actually know our future. We will die (memento-mori—remember-death). What happens after death nobody really knows.
(Verse 1)
The screen it glows, a siren’s call,
LinkedIn scrolls, YouTube enthralls,
The news feed whispers, “Just one peek,”
But that’s the path of the lost and weak.
My goal is etched, a beacon bright,
No time for shadows, only light.
(Chorus)
Laser focus, cut right through the haze,
These fleeting clicks, a pointless maze.
No cheap dopamine, no wasted time,
My energy climbs, my vision’s prime.
LinkedIn can wait, the news can fade,
My true work’s calling, unafraid.
(Verse 2)
Each moment precious, can’t be bought,
Distractions battle, fiercely fought.
The pull is strong, the comfort’s there,
But empty comfort, a gilded snare.
My compass set, on what I control,
To reach the summit, body and soul.
(Chorus)
Laser focus, cut right through the haze,
These fleeting clicks, a pointless maze.
No cheap dopamine, no wasted time,
My energy climbs, my vision’s prime.
LinkedIn can wait, the news can fade,
My true work’s calling, unafraid.
(Bridge)
The doubt may creep, a whisper low,
“Is this worth it? Should I let go?”
But in that stillness, I recall,
The greater purpose, standing tall.
(Chorus)
Laser focus, cut right through the haze,
These fleeting clicks, a pointless maze.
No cheap dopamine, no wasted time,
My energy climbs, my vision’s prime.
LinkedIn can wait, the news can fade,
My true work’s calling, unafraid.
(Outro)
Focus. Build. Achieve.
No more diversions, I believe.
Focusing on Variables outside control is Stealing Time from Actions
If we allow ourselves to focus on variables outside of our control, we invariably take the focus from things we can change. In other words: When you think about things outside of your control, you take resources away from things that can make your life better.
You have a finite amount of time and if you focus on that you cannot change, you steal time away from actions that bring change to your life.
IF: You focus on what you cannot change
  THEN: you steal time away, from actions that bring change.
As you focus on what you control, your circle-of-influence (what you control), increases.
Inversely if you focus on what you cannot change your circle of influence decreases.
Focusing on variables outside of your control is stealing time from the finite amount of time that you have left.
Hence, focus on what you can control. Think about what you can control. Laser focus on variables under your control. Focus on your actions, focus on your inputs into this life, and take the outputs to re-evaluate your input actions.
Control The Type of Information You Intake
It becomes easier to focus on things that are under our control when we filter the type of information coming our way. When we limit the information to IRA-INFO - Important Relevant Actionable Information, most importantly actionable, then our mind tends to gravitate towards thoughts that are also actionable.
On the opposite end of the spectrum if we take in information that is in-actionable, then we are more likely to have negative thoughts with zero action output == worry. Mainstream media is great example of in-actionable often fear focused information, that is likely to use up thought cycles with no positive outcomes (For more refer to Manufacturing-consent). Hence, in typical situations it’s best to be ignorant of such information, the important news of the world will reach you through other people.
Important Relevant Actionable Information (IRA Info)
Information must be proportionate to action, particularly habitual consumption of information.
What information consumes is rather obvious: it consumes the attention of its recipients. Hence, a wealth of information creates a poverty of attention and a need to allocate that attention efficiently among the overabundance of information sources that might consume it. — Herbert Simon, recipient of Nobel Memorial Prize in Economics
Wealth of Information --creates--> Poverty of Attention
Most importantly: Information Must be Actionable
Information Must BE Actionable
Most important part of Tim Ferris’s IRA filter is the actionable filter. If the information is not actionable then avoid the consumption of it.
It’s unproductive to seek out information such as world daily news for the sake of being “Informed”. That’s just stealing time from learning something that can actually move you forward in life.
I never watch the news and have bought one single newspaper in the last five years…In five years, I haven’t had a single problem due to this selective ignorance. - Tim Ferris
For actionable information, I consume a maximum of one-third of
one industry magazine (Response magazine) and one business magazine (Inc.) per month, for a grand total of approximately four hours/month. That’s it for results-oriented
reading. - Tim Ferris
Lifestyle design is based on massive action—output. Increased output necessitates decreased input.
Most information is time-consuming, negative, irrelevant to your goals, and outside of your influence.
I challenge you to look at whatever you read or watched today and tell me that it wasn’t at least two of the four. - Tim Ferris
Develop the habit of asking yourself, “Will I definitely use this information for something immediate and important?” It’s not enough to use information for “something”—it needs to be immediate and important. If “no” on either count, don’t consume it. Information is useless if it is not applied to something important or if you will forget it before you have a chance to apply it. - Tim Ferris
How to Grasp Specific Information
How to Grasp Specific Information: By Tim Ferris
How to Grasp Specific Info by Tim Ferris
IF task is "how-to" in nature:
  THEN: only read autobiographical accounts of “how I did it”.
    No speculators
    No wannabes
What if you need to learn to do something
your friends haven’t done? Like, say, sell a book to the world’s largest publisher as a
first-time author? Funny you should ask. There are two approaches I used:
I picked one book out of dozens based on reader reviews and the fact that the
authors had actually done what I wanted to do. If the task is how-to in nature, I only
read accounts that are “how I did it” and autobiographical. No speculators or
wannabes are worth the time.
Using the book to generate intelligent and specific questions, I contacted 10 of the top authors and agents in the world via e-mail and phone, with a response rate of 80%. I only read the sections of the book that were relevant to immediate next steps, which took less than two hours. To develop a template e-mail and call script took approximately four hours, and the actual e-mails and phone calls took less than an hour. This personal contact approach is not only more effective and more efficient than all-you-can-eat info buffets, it also provided me with the major league alliances and mentors necessary to sell this book. Rediscover the power of the forgotten skill called “talking.” It works. Once again, less is more. - Tim Ferris
Remember: If you can do something about a situation, then do not worry about it. Instead, go and enact change. If you cannot do anything, then do not worry about it. Instead, find something that you can change.
Quotes
“The chief task in life is simply this: to identify and separate matters so that I can say clearly to myself which are externals not under my control, and which have to do with the choices I actually control. Where then do I look for good and evil? Not to uncontrollable externals, but within myself to the choices that are my own” - Epictetus
“First understand the do-or-die importance of focus. If you don’t learn to focus, you will have a shallow and unrewarding life without any meaningful achievements. So make it a priority.” — Derek-Sivers
You train to be in the mindset of doing. The lens you look at the world focuses on things that you can change. And hence your perception of the world becomes that the world (your world) is changing and you see yourself as being able to influence the change.
You do not rise to the level of your goals - You fall to the level of your systems
The Power of Systems Over Goals
The Essence of the Principle
Goals: The targets we aim to hit.
Example: “Win a marathon.”
Systems: The day-to-day behaviors and routines that define our progress.
Example: “Consistent training schedule and nutrition plan.”
Core Insights:
Achievement mirrors your systems, not your ambitions: Success is less about the goals you set and more about the systems you follow.
Build robust systems for inevitable success: The strength of your daily practices determines your level of achievement.
Focus on what you can control: Concentrate on your actions and behaviors, which are within your control, rather than on outcomes, which often aren’t.
Adaptability within systems leads to growth: Systems that allow for feedback and adjustment are more effective in reaching long-term success.
Developing Strong Systems:
Map out daily and weekly routines that align with your ultimate objectives.
Implement consistent habits that are directly linked to your areas of focus.
Regularly review and refine your systems based on outcomes and new insights.
Embrace an identity that reflects the processes of your systems.
The Fundamental Truth
Your level of success is a reflection of the systems you implement and maintain, not the height of your goals. By focusing on building effective systems, you ensure continuous progress and long-term achievement.
If successful and unsuccessful people share the same goals, then the goal cannot be what differentiates the winners from the losers.
Problems arise when you spend too much time thinking about your goals and not enough time designing your systems.
Problem #1: Winners and losers have the same goals.
Goal setting suffers from a serious case of survivorship bias. We concentrate on the people who end up winning—the survivors—and mistakenly assume that ambitious goals led to their success while overlooking all of the people who had the same objective but didn’t succeed.
Every Olympian wants to win a gold medal. Every candidate wants to get the job. And if successful and unsuccessful people share the same goals, then the goal cannot be what differentiates the winners from the losers. It wasn’t the goal of winning the Tour de France that propelled the British cyclists to the top of the sport. Presumably, they had wanted to win the race every year before—just like every other professional team. The goal had always been there. It was only when they implemented a system of continuous small improvements that they achieved a different outcome.
Losers have Goals and Dreams, Winners Have Systems
Problem #2: Achieving a goal is only a momentary change.
Imagine you have a messy room and you set a goal to clean it. If you summon the energy to tidy up, then you will have a clean room—for now. But if you maintain the same sloppy, pack-rat habits that led to a messy room in the first place, soon you’ll be looking at a new pile of clutter and hoping for another burst of motivation. You’re left chasing the same outcome because you never changed the system behind it. You treated a symptom without addressing the cause.
Achieving a goal only changes your life for the moment. That’s the counterintuitive thing about improvement. We think we need to change our results, but the results are not the problem. What we really need to change are the systems that cause those results. When you solve problems at the results level, you only solve them temporarily. In order to improve for good, you need to solve problems at the systems level. Fix the inputs and the outputs will fix themselves.
Problem #3: Goals restrict your happiness. (Happiness is in the future).
The implicit assumption behind any goal is this: “Once I reach my goal, then I’ll be happy.” The problem with a goals-first mentality is that you’re continually putting happiness off until the next milestone. I’ve slipped into this trap so many times I’ve lost count. For years, happiness was always something for my future self to enjoy. I promised myself that once I gained twenty pounds of muscle or after my business was featured in the New York Times, then I could finally relax.
Furthermore, goals create an “either-or” conflict: either you achieve your goal and are successful or you fail and you are a disappointment. You mentally box yourself into a narrow version of happiness. This is misguided. It is unlikely that your actual path through life will match the exact journey you had in mind when you set out. It makes no sense to restrict your satisfaction to one scenario when there are many paths to success.
A systems-first mentality provides the antidote. When you fall in love with the process rather than the product, you don’t have to wait to give yourself permission to be happy. You can be satisfied anytime your system is running. And a system can be successful in many different forms, not just the one you first envision.
Problem #4: Goals are at odds with long-term progress.
Finally, a goal-oriented mind-set can create a “yo-yo” effect. Many runners work hard for months, but as soon as they cross the finish line, they stop training. The race is no longer there to motivate them. When all of your hard work is focused on a particular goal, what is left to push you forward after you achieve it? This is why many people find themselves reverting to their old habits after accomplishing a goal.
The purpose of setting goals is to win the game. The purpose of building systems is to continue playing the game. True long-term thinking is goal-less thinking. It’s not about any single accomplishment. It is about the cycle of endless refinement and continuous improvement. Ultimately, it is your commitment to the process that will determine your progress.
Proactive people focus their efforts in the Circle of Influence. They work on the things they can do something about. The nature of their energy is positive, enlarging and magnifying, causing their Circle of Influence to increase.
Anytime we think the problem is “out there,” that thought is the problem. We empower what’s out
there to control us. The change paradigm is “outside-in”—what’s out there has to change before we can change.
Related Quotes
“The ignorant man’s position and character is this: he never looks to himself for benefit or harm, but to the world outside him. The philosopher’s position and character is that he always look to himself for benefit and harm.” — Epictetus, Enchiridion
God grant me the serenity to accept the things I cannot change, courage to change the things I can change; and wisdom to know the difference. - Serenity Prayer
Imagine you’re dealing with someone who’s hoarding. Now, people who are hoarding are often older, or neurologically damaged, or have obsessive-compulsive disorder. Then, you walk into their house and find around 10,000 items. There are maybe a hundred boxes. You open a box, and inside, there’s a mix of pens, old passports, checks, a collection of silver dollars, some hypodermic needles, dust, and even a dead mouse. The house is filled with boxes like that—absolute chaos. Not order. Chaos.
You might wonder, is that their house? Or Is that their being? Is that their mind? The answer is: there’s no difference. So, if you want to organize your psyche, you could start by organizing your room. This might be easier, especially if you’re a more concrete person and need something concrete to begin with.
So you go clean up under your bed and you make your bed and you organize the papers on your desk. And you think well just exactly what are you organizing? Are you organizing the objective world, or are you organizing your field of being—your field of total experience? Jung believed that, and I think there’s a Buddhist doctrine nested in there, that at the highest level of psychological integration, there’s no difference between you and what you experience.
Now, you might think, “Well, I can’t control everything I experience,” but that’s no objection because you can’t control yourself entirely anyway. So, the mere fact that you can’t extend control over everything you experience is no argument against the idea that you should still treat that as an extension of yourself.- Jordan-Peterson/video: reference
[people reach out about] How starting to clean up their room changed their life is quite fun because it’s something I always tell people to do instead of going out and protesting. If you want to change the world, you start from yourself and work outward because you build your competence that way. It’s like, I don’t know how you can go out and protest the structure of the entire economic system if you can’t keep your room organized.- Jordan-Peterson/video ref
Important Relevant Actionable Information (IRA Info)
Information must be proportionate to action, particularly habitual consumption of information.
What information consumes is rather obvious: it consumes the attention of its recipients. Hence, a wealth of information creates a poverty of attention and a need to allocate that attention efficiently among the overabundance of information sources that might consume it. — Herbert Simon, recipient of Nobel Memorial Prize in Economics
Wealth of Information --creates--> Poverty of Attention
Most importantly: Information Must be Actionable
Information Must BE Actionable
Most important part of Tim Ferris’s IRA filter is the actionable filter. If the information is not actionable then avoid the consumption of it.
It’s unproductive to seek out information such as world daily news for the sake of being “Informed”. That’s just stealing time from learning something that can actually move you forward in life.
I never watch the news and have bought one single newspaper in the last five years…In five years, I haven’t had a single problem due to this selective ignorance. - Tim Ferris
For actionable information, I consume a maximum of one-third of
one industry magazine (Response magazine) and one business magazine (Inc.) per month, for a grand total of approximately four hours/month. That’s it for results-oriented
reading. - Tim Ferris
Lifestyle design is based on massive action—output. Increased output necessitates decreased input.
Most information is time-consuming, negative, irrelevant to your goals, and outside of your influence.
I challenge you to look at whatever you read or watched today and tell me that it wasn’t at least two of the four. - Tim Ferris
Develop the habit of asking yourself, “Will I definitely use this information for something immediate and important?” It’s not enough to use information for “something”—it needs to be immediate and important. If “no” on either count, don’t consume it. Information is useless if it is not applied to something important or if you will forget it before you have a chance to apply it. - Tim Ferris
How to Grasp Specific Information
How to Grasp Specific Information: By Tim Ferris
How to Grasp Specific Info by Tim Ferris
IF task is "how-to" in nature:
  THEN: only read autobiographical accounts of “how I did it”.
    No speculators
    No wannabes
What if you need to learn to do something
your friends haven’t done? Like, say, sell a book to the world’s largest publisher as a
first-time author? Funny you should ask. There are two approaches I used:
I picked one book out of dozens based on reader reviews and the fact that the
authors had actually done what I wanted to do. If the task is how-to in nature, I only
read accounts that are “how I did it” and autobiographical. No speculators or
wannabes are worth the time.
Using the book to generate intelligent and specific questions, I contacted 10 of the top authors and agents in the world via e-mail and phone, with a response rate of 80%. I only read the sections of the book that were relevant to immediate next steps, which took less than two hours. To develop a template e-mail and call script took approximately four hours, and the actual e-mails and phone calls took less than an hour. This personal contact approach is not only more effective and more efficient than all-you-can-eat info buffets, it also provided me with the major league alliances and mentors necessary to sell this book. Rediscover the power of the forgotten skill called “talking.” It works. Once again, less is more. - Tim Ferris
graph TD
    A(Thoughts) -->|Become| F(Destiny)
    A(Thoughts) -->|Become| B(Words)
    B -->|Become| C(Actions)
    C -->|Become| D(Habits)
    D -->|Become| E(Character)
    E -->|Become| F(Destiny)
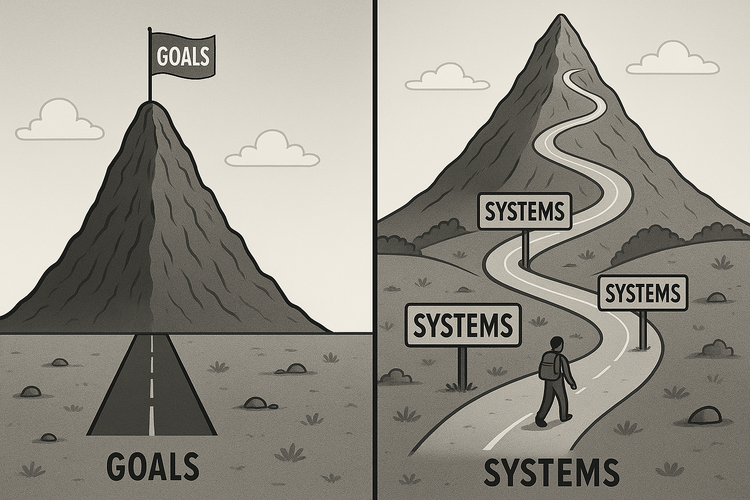 -
-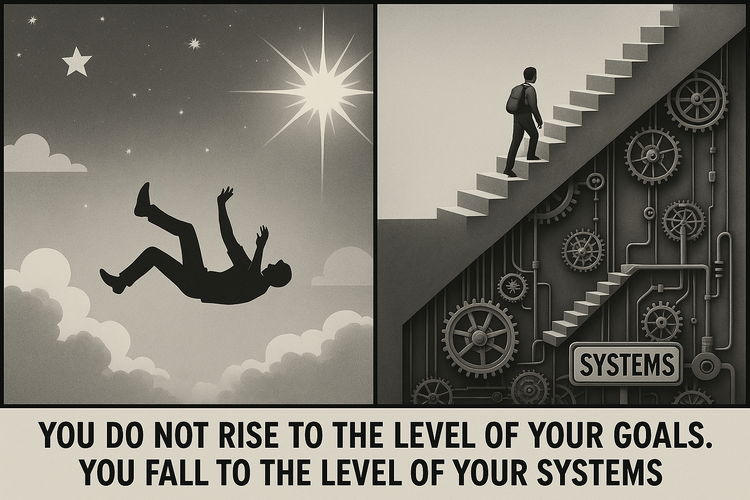 -
-{max-width: 400px, display: block, margin: 0 auto, border: 5px solid black}
Link to original