Install Plugin from Jar File
Select JAR to install.
GPT instructions
GPT Instructions
To install a JAR as an IntelliJ plugin, follow these steps:
1. Prepare the JAR File
Ensure the JAR file is packaged correctly as an IntelliJ plugin. It should contain the necessary META-INF/plugin.xml file and all required dependencies.
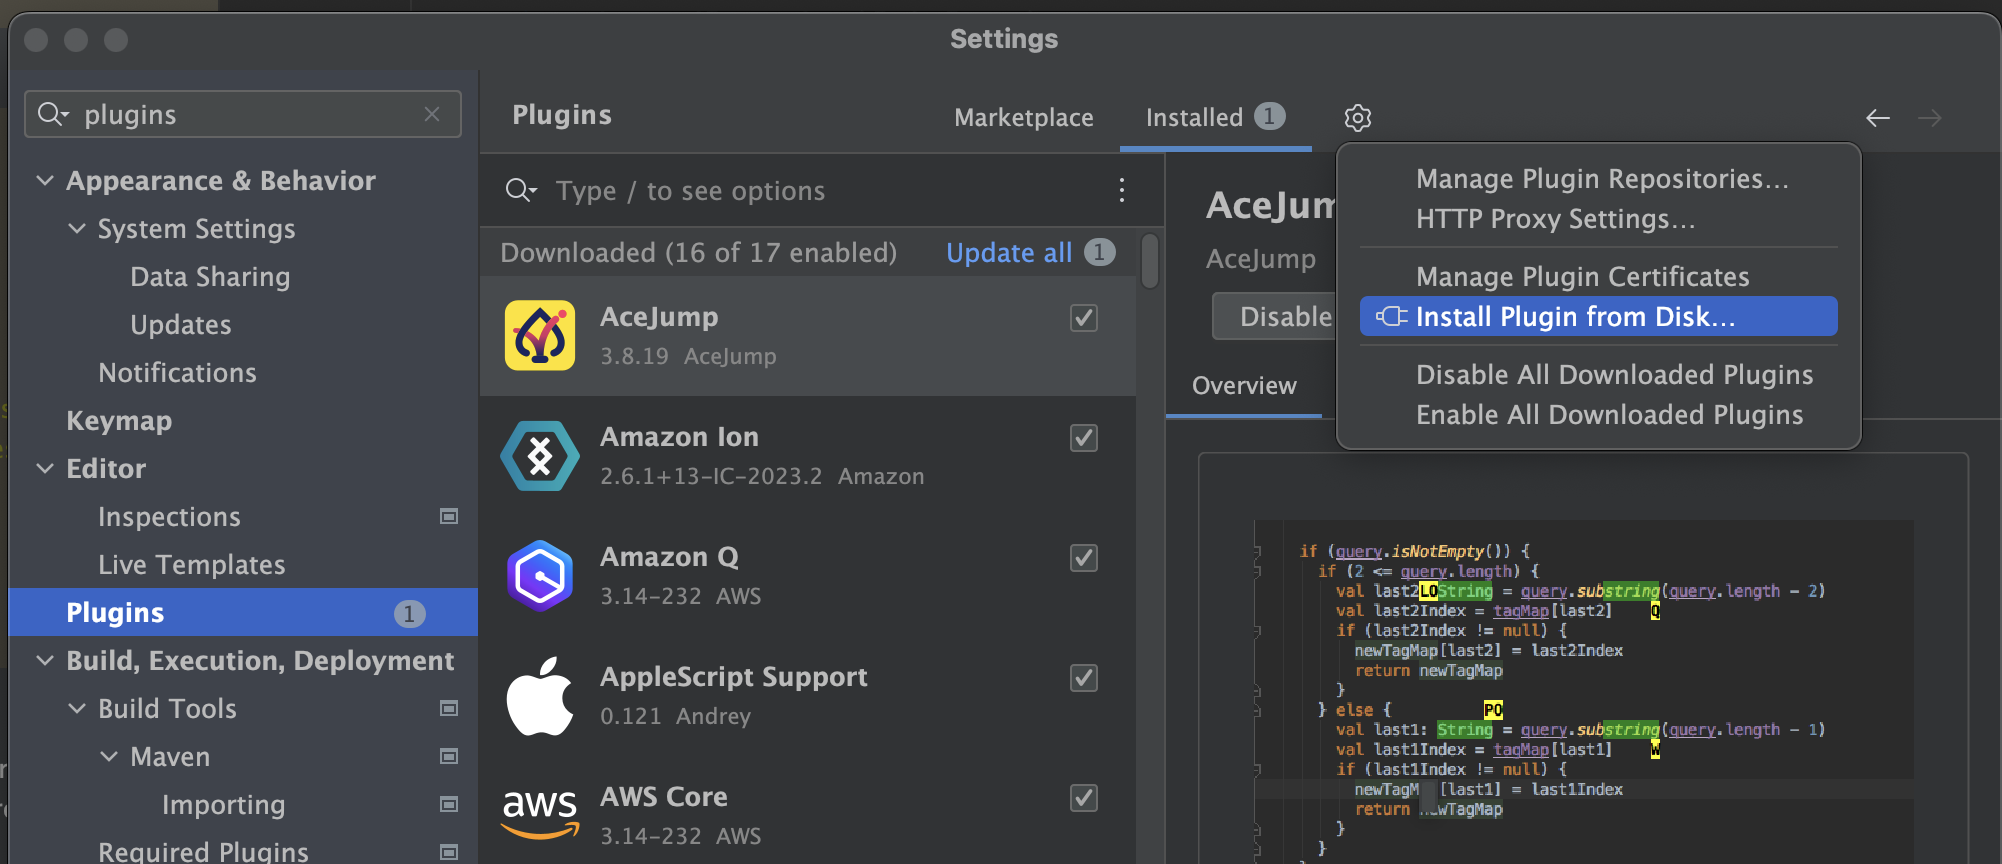
2. Install the Plugin from Disk
- Open IntelliJ IDEA.
- Go to File > Settings (or IntelliJ IDEA > Preferences on macOS).
- Navigate to Plugins in the left sidebar.
- Click on the ⚙️ Gear icon at the top-right corner of the Plugins window.
- Select Install Plugin from Disk from the dropdown menu.
- In the file chooser, navigate to and select the JAR file you want to install.
- Click OK to install the plugin.
- Restart IntelliJ IDEA if prompted.
3. Verify Installation
After restarting IntelliJ IDEA:
- Go back to File > Settings > Plugins.
- Look under the Installed tab to confirm that your plugin is listed.
4. Activate the Plugin (If Needed)
If your plugin requires activation:
- Go to File > Settings > Plugins.
- Find your plugin under the Installed tab and ensure it's enabled (checkbox checked).
- Apply and restart IntelliJ IDEA to activate the plugin.
That's it! Your JAR file should now be installed and working as an IntelliJ plugin.